How to Build a Storm Shelter
(continued below…)
It’s finally published!!!
|
|
A funny,
inspirational story of growing up in America, finding God (or being found BY
Him), written by yours truly! Replete
with humor and honest insight… Into the Cross-Walk, by BIC (actually Bic is just my pen-name; my real name is Mark). |
|
Available in the
following formats: |
|
|
Download a sample
chapter here
(pdf) or view here (as a web site) |

About me:
Mark graduated in the top 1% of his 5A high school class, is
a certified ASE mechanic, and once held a medical degree before the doctor told
him to put it back on the wall. Mark is
a devout born-again Christian who has perfected his own recipes for home-brewed
coffee and all-grain beer, and has been playing the bass guitar since
1984. Besides writing, he is an avid
programmer, a dog lover, has a really cool car and likes to start lots of
interesting hobbies, and then abandon them.
How to build a
what?
A storm shelter. Some place that I can have in my home, so the next time a hurricane is bearing down on the Gulf Coast, I don’t get stuck in traffic trying to evacuate. I spent a total of 36 hours in the car with my family and dog during Rita in 2005:
http://www.ls1m.com/Hurricane Rita
2005.htm
It was like a horrible nightmare. Next time, I want to be prepared so I can ride it out at home, instead of on the road.
The Windows:
I started out thinking I could just fortify my home to withstand a category 5 storm. The most obvious thing to do was protect the windows. I got some 5/8” lumber and made some window covers using these anchor bolts & washers:
I could have use the plylox fasteners that they sell at the local hardware store http://www.plylox.com/, but I don’t have recessed windows surrounded by brick. These anchors are much more robust anyway, because they go through the siding and screw into the studs. I followed the instructions & built a total of 14 panels on my home and felt pretty good about it. Here’s the plan I drew up:
http://www.ls1m.com/demo/HurricanePlan2006.pdf
The Garage Door:
After the windows, the next most vulnerable part of a house is the garage door. Once the garage door gets blown in (or sucked out), and all that wind can get under the roof, it’s goodbye house. I have a two-door garage, with one door being non-functional since I put in my home office. To brace the door from being sucked out as well as blown in, I built a 2x4 frame behind it & secured the wood to the garage door panels with bolts. It’s really solid. For the other door that opens & closes, I got one of these:
It’s removable & installs in less than a minute, and is made of some real strong aluminum. A little expensive, but not too bad.
A Generator:
My next thought was, how in the world am I going to survive after a storm with no electricity? I must have a backup generator, and not one that runs on gasoline, but a natural-gas powered one that can hook into the gas line & run for at least 2 weeks. I first looked at Guardian models like they sell at Home Depot:
http://www.guardiangenerators.com/
I determined that their small 7000 watt generator could power up my entire house, except for the air conditioner, but I had a small window unit in my garage office that I could use to make at least one part of the house bearable. With the Texas heat reaching over 100 degrees during hurricane season, a/c isn’t a luxury, it’s a life-sustaining necessity. I also looked at the liquid-cooled models, as well as other heavy-duty brands like Kohler and others, and while those are great & can run forever, they’re hellaciously expensive to run. I calculated that my gas bill would approximately equal my normal electric bill when running on the small Guardian, which I could live with. There are only three things that you have to remember about air-cooled generators like the smaller Guardian models: One, you MUST have 3 feet of air around them when they’re installed. The pictures of them butted up against the house are inaccurate – they’ll burn up. Second, there’s a specific break-in procedure that you MUST follow if you want the engine to last. And third, you MUST change the oil every 50 hours or so. Given that, they’ll last forever. My plan was to put it on the side of the house, on cement blocks to keep ants & flood waters away, but I changed my mind when I looked around my attic.
The Roof:
To survive a big storm, the roof must be tied to the walls, and the walls tied to the foundation, with hurricane straps. These are little galvanized straps made by Simpson that go around the wood & get nailed in place, perpendicular to the up-force of the storm, and they need to be at least on every other stud. My house? None were installed. Not only that, it looked like the guys who built it held the wood in place, and shot a nail gun in it several times until it would barely stand up & they could hammer the roof on. Even with the window covers & garage brace, I didn’t feel safe in the house, and I wasn’t about to remove the roof & siding to retro-fit it with hurricane straps. Another issue is the ventilation. To prevent the roof from lifting off, there must be a good ridge vent on every part of the roof, to let pressure escape, and there has to be more ridge vent than soffet vent area. Again, my roof is woefully inadequate to the task.
An Outside Shelter
with a Small Generator:
So… I had the bright idea of building a storm shelter in the back yard. It was a brilliant design, with a bathroom and a sink, and it could double as an extra little apartment. The idea was to make it big enough to live there for up to 2 weeks after a storm leveled the house.
http://www.ls1m.com/demo/HurricanePlan2007.pdf
Unfortunately, I found out that plumbers are CROOKS! I got an estimate on the slab of $4000, which I thought was incredibly expensive, but the stupid plumbers wanted over $6000, just to put the floor drains in for the shower! Unbelievable. But one of the features of the design was to have a small natural-gas powered generator in the entryway, protected from the elements but with adequate ventilation, so that I could actually have power & air conditioning during the storm. Pretty cool, huh? I bought one of these:
http://www.yamaha-propane-natural-gas-generators.com/
The Yamaha EF2600C, which puts out 2600 watts, plenty for the shelter’s window a/c, the lights, and even a small refrigerator. Yamaha’s have an excellent reputation for running forever, as do the more expensive Honda’s, and these are factory-modified for natural gas service. But, given the fact that I don’t have thousands and thousands of dollars to give to the plumbers & other contractors, I cancelled the whole outdoor shelter project. I had already bought the generator, though, and my plan now is to power the garage office with it, which has its own electric sub-panel. Maybe I’ll get a Guardian some day, but for now the Yamaha will do nicely. Just to make sure it would last as long as possible, after break-in I put in some Amsoil synthetic oil that’s especially formulated for natural-gas powered engines that don’t get used very often:
http://www.amsoil.com/storefront/ang.aspx
Then I hooked it up to a gas line using a ¾” high-pressure hose & a union
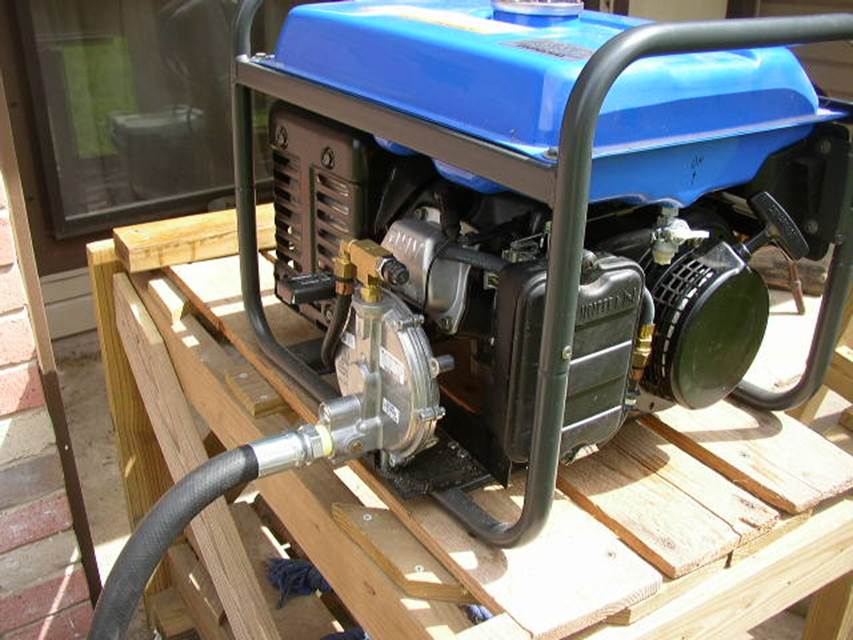
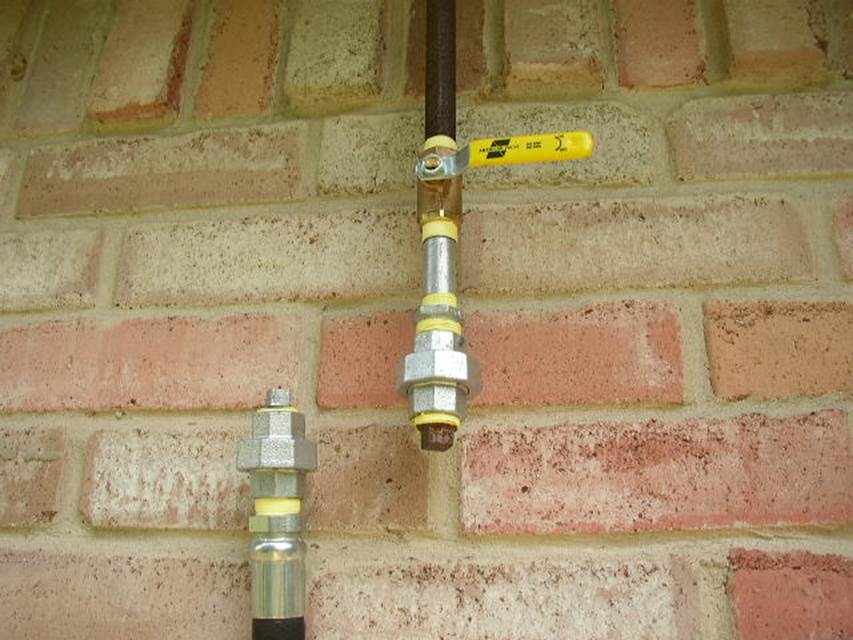
To hook up the generator, all I have to do is take the unions apart & hook the two lines together. I think the previous owner had a back-yard hot tub or something; that’s what that ½” line must have been for. I used a ¾” hose so it’d hold a little extra “surge” volume. At 25 feet, I really should have a ¾” line straight to the gas meter, but this will do. For now.
What about
flooding?
Good question. Everyone always talks about the dreaded storm surge that will wash Houston down to Galveston. Well, I don’t live THAT close to the coast. I’m about 30 miles inland. I found a storm surge computer simulation, and it shows the water barely coming to the edge of my neighborhood under worst-case scenario’s. I checked the county flood district map, and I’m in a zone-X, which means I’m outside of the 100-year and 500-year flood zones, so basically they never expect it to flood. And finally, I went to the national geological survey site:
and found out my property is 31 feet above sea level, and I think that’s at the street level, so I’m actually a few feet higher than that in the house. I’m not worried. Worst case scenario for me is some street flooding that may occur because of heavy rains and maybe some clogged ditches, meaning my carpet will get all wet. I’m not looking for flood waters to cover the roof like it did in New Orleans, where the houses were actually below sea level.
The Shelter:
My new plan was to build a “panic room”. Something small, made out of concrete blocks, that would be big enough to weather the storm in, but not big enough to live in for any length of time. Just in case, you know, so I’ll survive with my family. There are several options for this, and many companies make safe rooms and storm shelters. In retrospect, it would have been a lot easier and maybe even cheaper to just buy one, but I can’t stand to buy something when I can build it myself; it’s just me, I’m weird.
Plans for building a 8’x8’ shelter are available from FEMA, under their document 320:
http://www.fema.gov/plan/prevent/saferoom/fema320.shtm
It’s designed to withstand a category-5 storm as well as an F5 tornado. Very stout. They also have plans for a large commercial shelter, document 361:
http://www.fema.gov/library/viewRecord.do?id=1657
which has a lot of useful information in it about which materials can withstand pressure & debris impact, that sort of thing. I also found plans for building a safe room out of wood, but I can’t find the site any more. There’s another site that’s very useful, called the National Storm Shelter Association, that has a lot of information about storm shelters:
I looked at the Fema 320 document, and decided a concrete safe room, built with concrete blocks and a poured concrete roof, was the way to go. I didn’t feel like any wooden structure would be safe enough, and I thought that concrete looked like something fun to learn. Like I said, I’m weird.
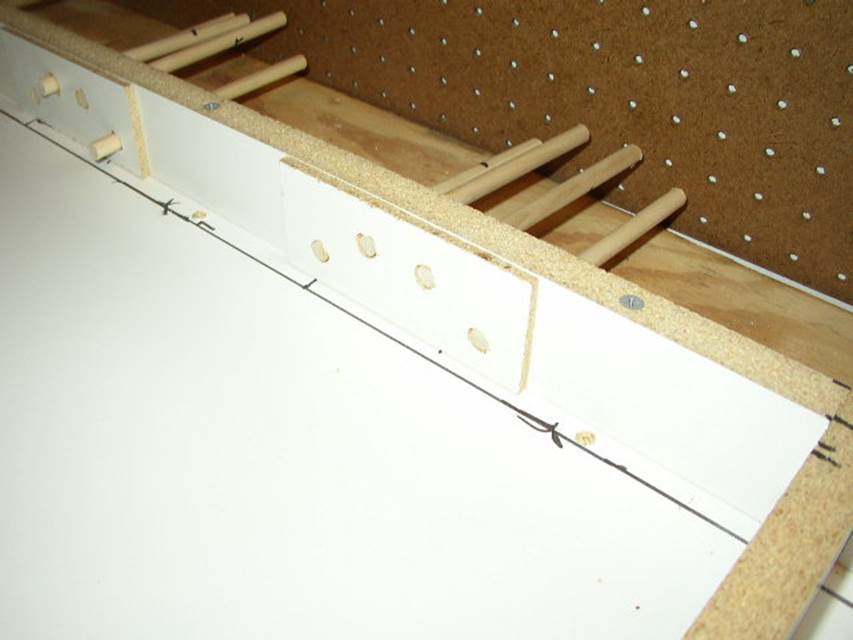
The Foundation:
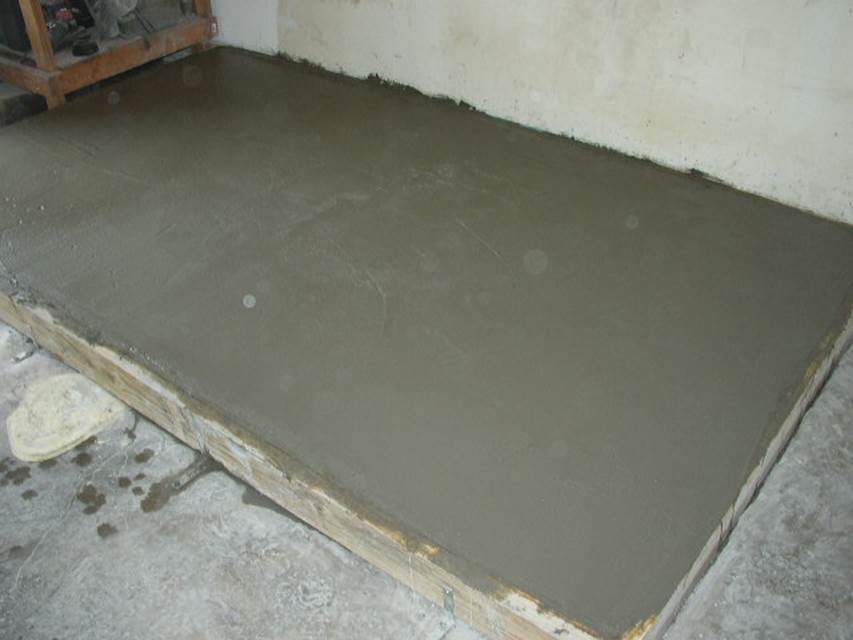
The only place in the house to put a storm shelter was the garage. My wife wasn’t about to let go of any other room in the house, and besides, concrete is messy for indoors. The garage already has a concrete floor. It probably would have been fine to just build on top of it, but in the theme of “too much is cool”, I decided to build a sub-foundation for my shelter. The first item of business was to build the forms. My goal was to make the interior of the room around 4’x8’ so I could top it off with a thick sheet of plywood, so I made the forms about 5’4 by 9’4.
The forms are there temporarily, just to hold the concrete in place so it doesn’t ooze out all over the garage. The garage floor was slanted, so I ended up making one form end with 2x6 lumber (5 ½” thick) and it grew to about 8” by the time I got to the other end. Usually, when doing forms outside, you put wood stakes & braces to hold them in place. That works great, because there’s no harm in the concrete spilling a little bit under the ground where you’ve dug out for the form. But in my case, I used L-brackets and drilled them into the concrete to hold the wood down to the ground, so the wood wouldn’t rise up & let concrete spill out.
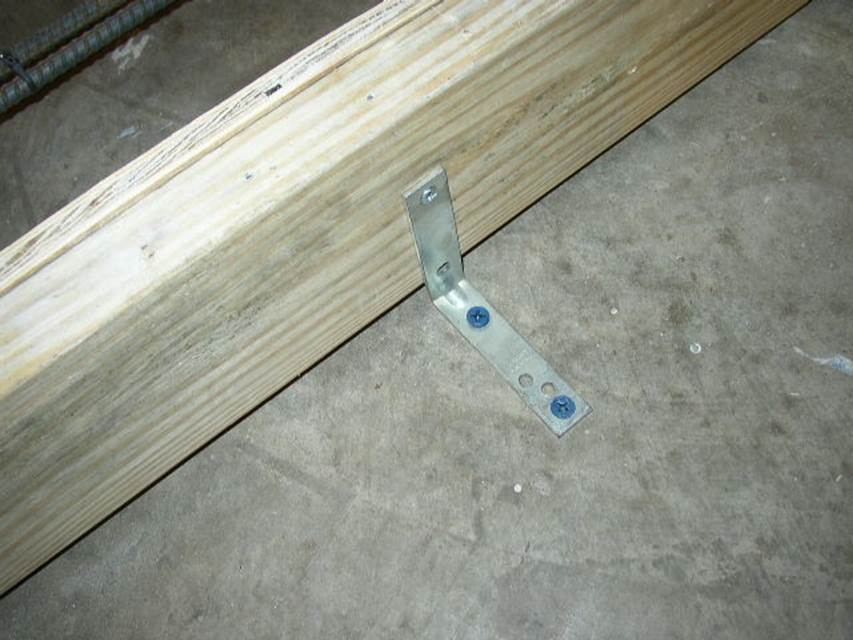
Concrete is very heavy; I used heavy lumber because it ends up being a lot of pressure pushing out on the forms.
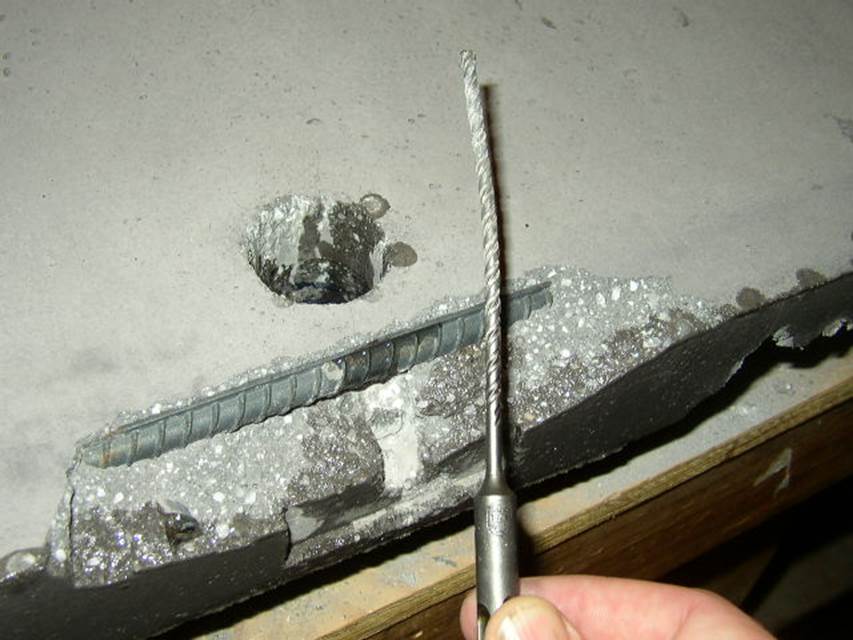
Then came the subject of how to make sure the new foundation “stuck” to the old foundation. Usually, you just put some of this glue-type stuff down and that’s sufficient, but I thought it would be better to stick some rebar into the existing foundation, glue it in place with epoxy, and bend it into an L-shape so it would take an act of God to separate the two.
To drill holes in concrete, I used a 1” hammer drill that I got for $60 from Harbor Freight.
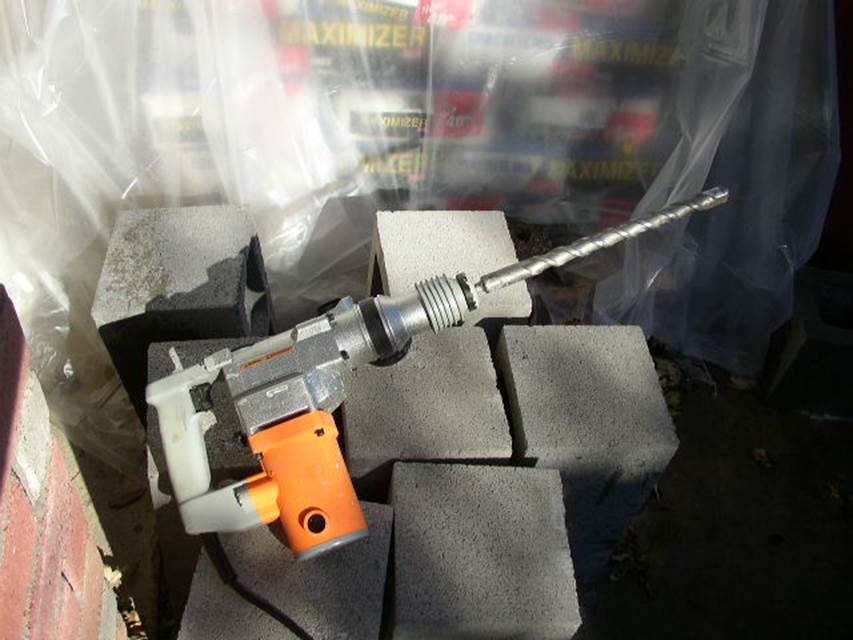
Well, that’s not exactly true. At first I tried to use a “Firestorm” hammer drill from Lowe’s, and after I used about 4 masonry bits and got blisters all over my hands, I went to Harbor Freight and got the biggest one they sold. It was only $60 – gotta love those Chinese slave-labor factories! The rebar I had to get delivered from a local lumberyard called McCoy’s. It comes in 20-foot sections (about $5 each), which I stashed on the side of the house. Cutting the rebar was surprisingly easy. I got some fiber “metal cutting” discs from Lowe’s and used my circular saw.
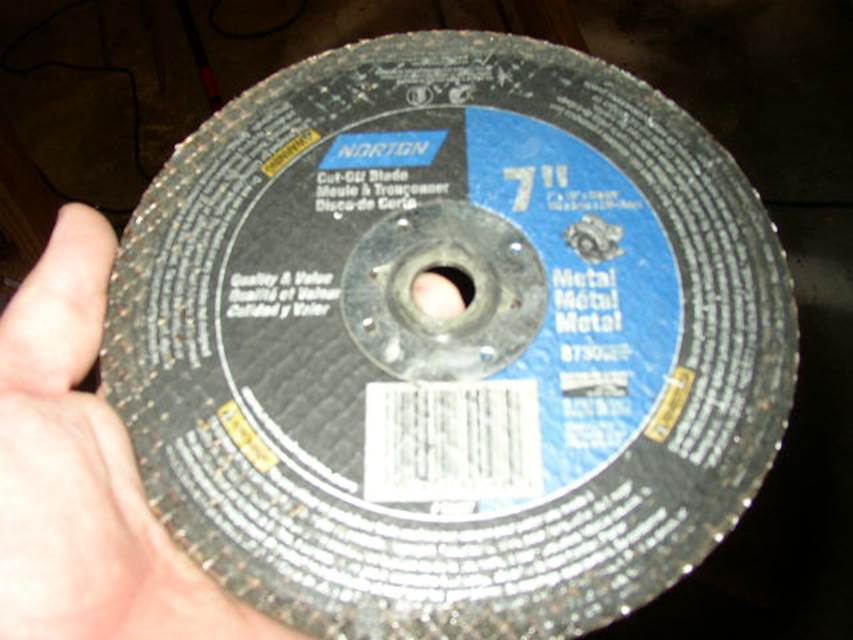
It was even more fun at night when you could see the sparks flying all over the place. The discs are cheap, like $2 each, and they make probably 20-30 cuts in my ½” rebar (called “#4”) before the discs get too small. Bending the rebar was a different story. Half-inch bars of iron don’t bend too easily without the proper tools. So, I bought a couple of “hickey bars” from a place called Fishiron:
http://fishiron.com/hickey.htm
(Update June 2013: The new link is http://dcmachinc.com/modules/store/Hicky-Bar_C7134.cfm. I’d also like to point out that these things make great weapons. I keep one near my bed and have answered the door late at night several times ready to put three holes in an intruder’s head…)
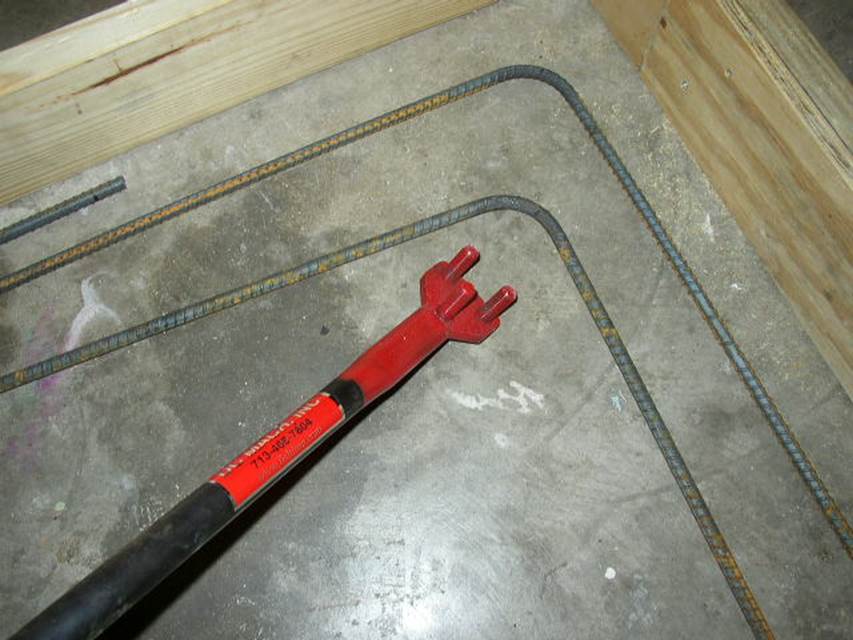
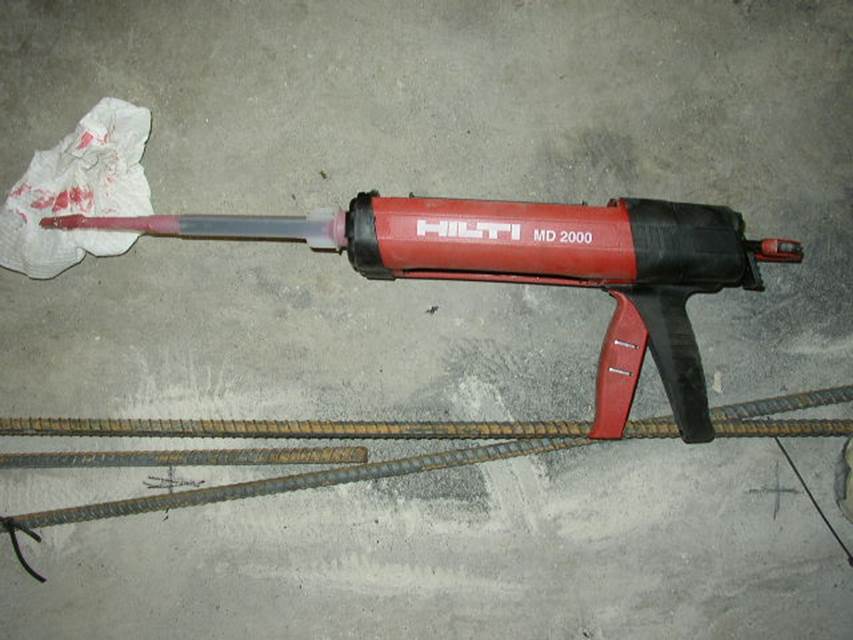
I got the 30” handled model, per the shop owner’s recommendation. They sell the same thing at Home Depot, but it’s bulkier and doesn’t look like it would make tight bends as well. So, I had my holes drilled (5/8”), I had my rebar cut & bent. Now all I needed was some real good epoxy. On a recommendation from a friend who just built his own house, I used Hilti RE-500 glue:
http://www.us.hilti.com/holus/modules/prcat/prca_navigation.jsp?OID=-12137
I bought what amounted to a big caulking gun and several 11-oz cartridges. Each cartridge was good for about 25 holes.
I was fortunate enough that Hilti had a local store not too far from my job, so I was able to buy the RE-500 when I needed it. I tried ordering on-line, but because of HAZMAT regulations, shipping would have been horrendous. The instructions for securing ½” rebar call for a 5/8”, 4” deep hole. You drill the hole, clean it out (compressed air if you have it), squirt some RE-500 in, then twist the rebar into place. It stays very soft & pliable, starts to harden after an hour or so, and then it’s several times stronger than the concrete. Way cool.
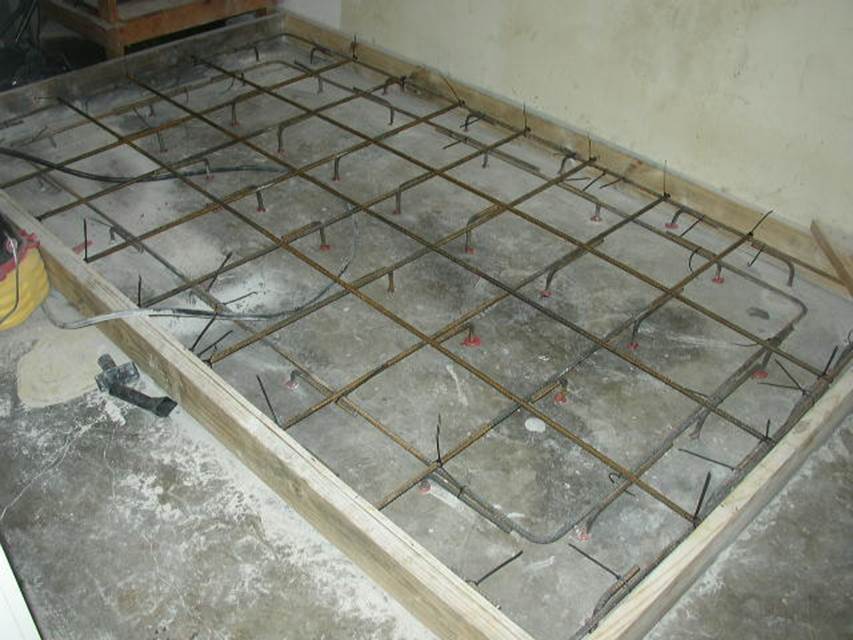
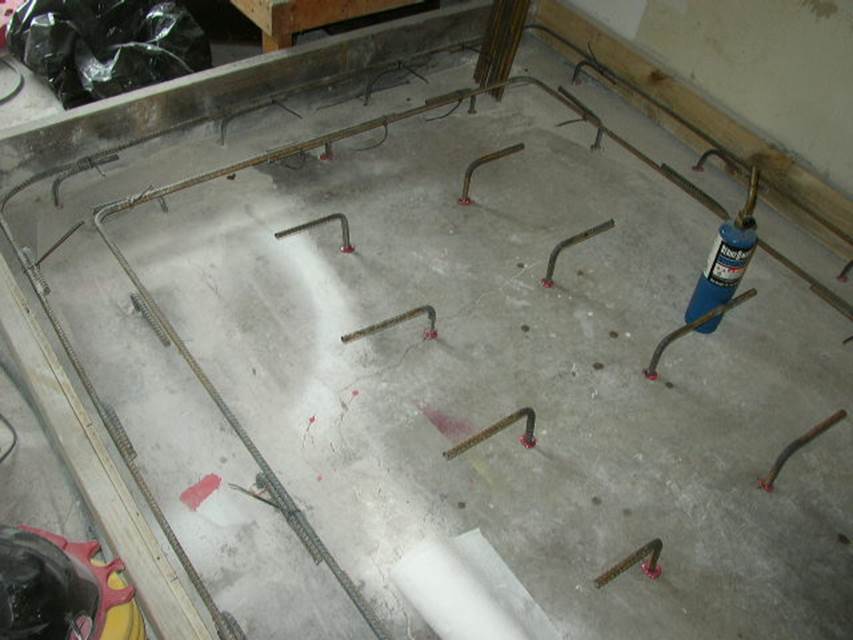
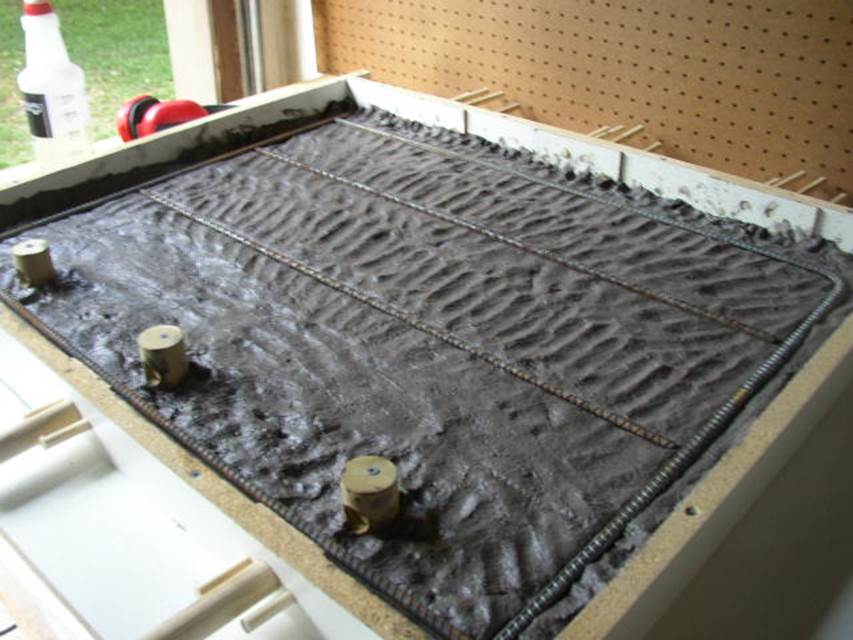
Now that I had the anchors installed in the concrete, I went about putting rebar all around the perimeter of where the walls were going to be. I also put rebar every 12”, in each direction. I know this is the right thing to do, because I snuck a peek at a road construction site before they poured their concrete in.
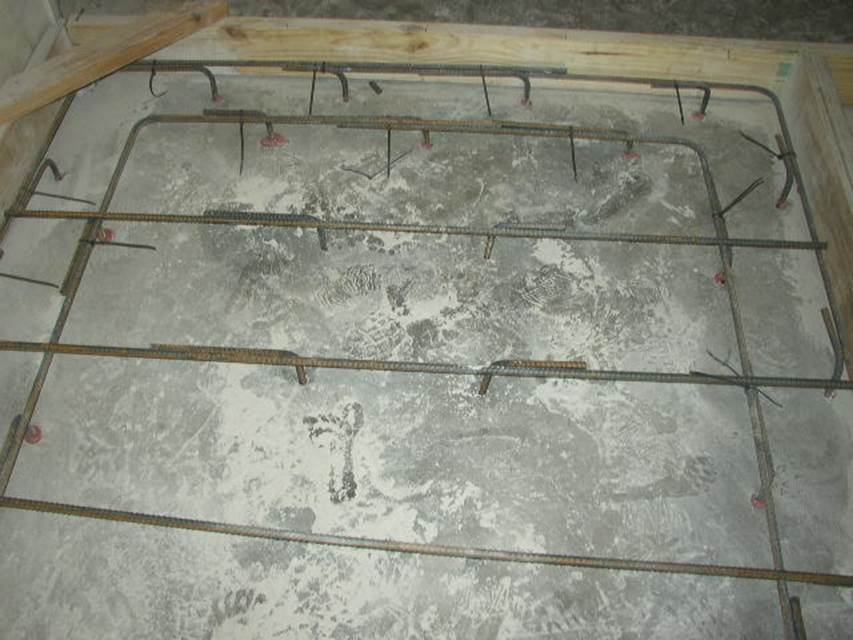
Originally, I was just using zip-ties to hold the rebar in place, but I went back and got rebar wire, since that’s what the road crew was using, and twist-tied all the rebar with a wrench. When I was done, it was quite solid-looking.
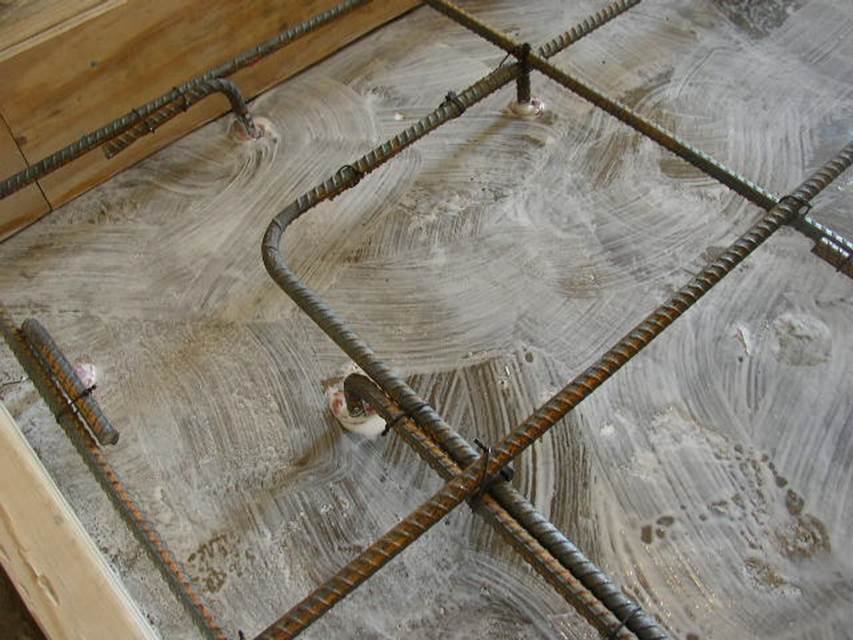
Before I poured the concrete, I got some Concrete Bonding Adhesive from the hardware store.
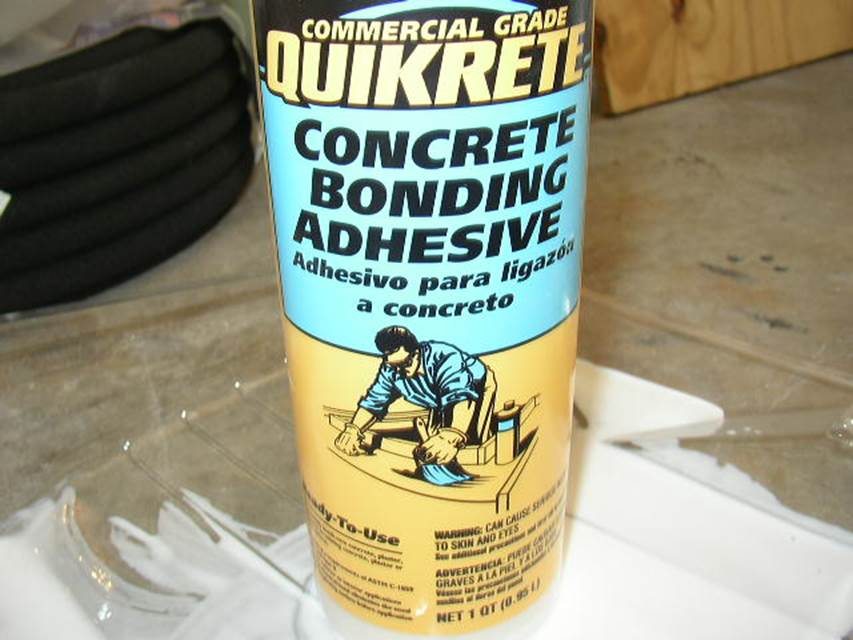
It looks just like Elmer’s glue, and I brushed it all over the floor with a cheap paintbrush & let it dry.
For the concrete, originally I was going to use plain old QuickRete concrete mix, generic stuff that everyone uses, but the guy at McCoy’s Lumber talked me into using Maximizer.
This stuff is rated at 5500 psi instead of the QuickRete’s 3000 psi. I don’t know what that means, but a bigger number is better. It’s also less dense. An 80-lb bag of regular concrete yields 0.6 cu ft, and 80lb of Maximizer yields 1.0 cu ft. That means my shelter will be stronger, and lighter, which concerns me because I don’t want my house to start listing to one side. I calculated that I needed approximately 1 pallet of Maximizer bags, which I of course got delivered. Thank God they come in 40lb sacks instead of 80lb. I would have never been able to lift more than a couple of those big bags – OK I may be a wimp, but I’m not in a hospital bed recovering from back surgery. To mix the concrete, I bought an electric concrete mixer from Harbor Freight:
http://www.harborfreight.com/cpi/ctaf/displayitem.taf?Itemnumber=31979
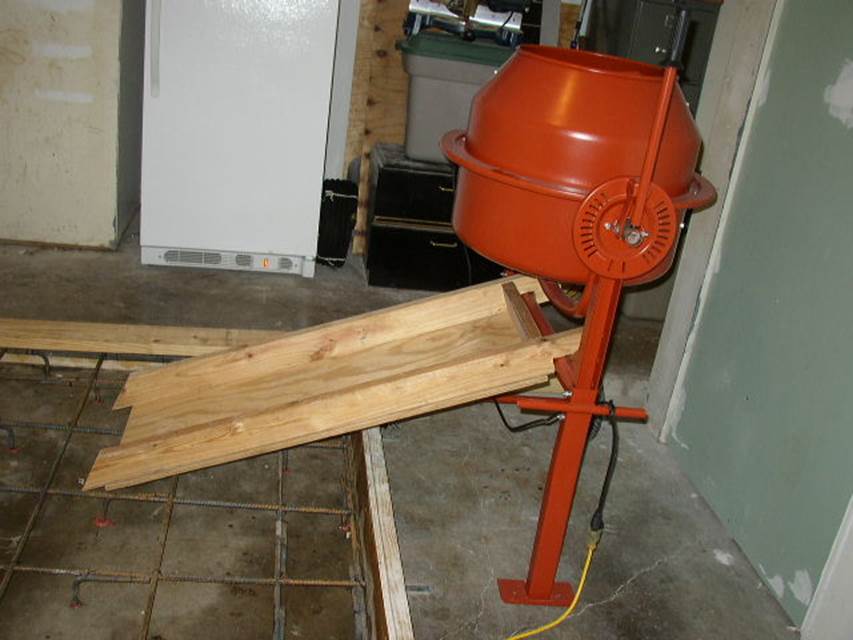
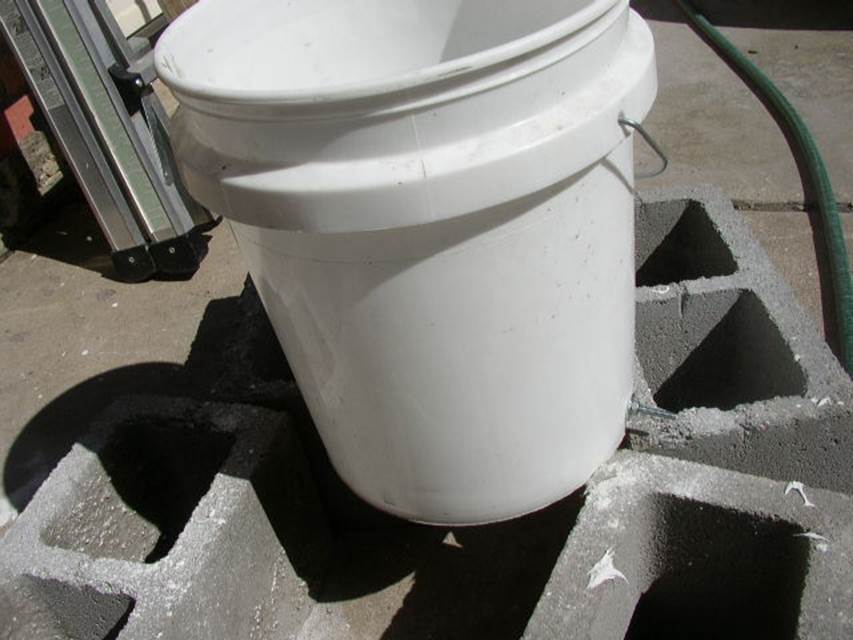
I got it for under $200, which allowed me to take my time & work at my own pace, instead of having to rush back to the rental store. Besides, I didn’t have any way to tow or truck a concrete mixer home. The one at Harbor Freight came in a box, that fit in the back of my Camaro easily. And it only took about 2 hours to assemble – OK, maybe 3. I know it’s not a good brand-name mixer. It’s belt-driven, 110-volts, and looks like it can’t handle more than a couple of bags at a time. That’s OK with me. I found that if you put in the water first, start it tumbling, and then pour in the concrete, it does quite well. I also built a little chute out of lumber to get the concrete into the form. The Maximizer instructions call for 1.2 gallons of water per 40lb bag. Since water is 8.34lb/gal, that works out to almost exactly 10lb of water for each bag.
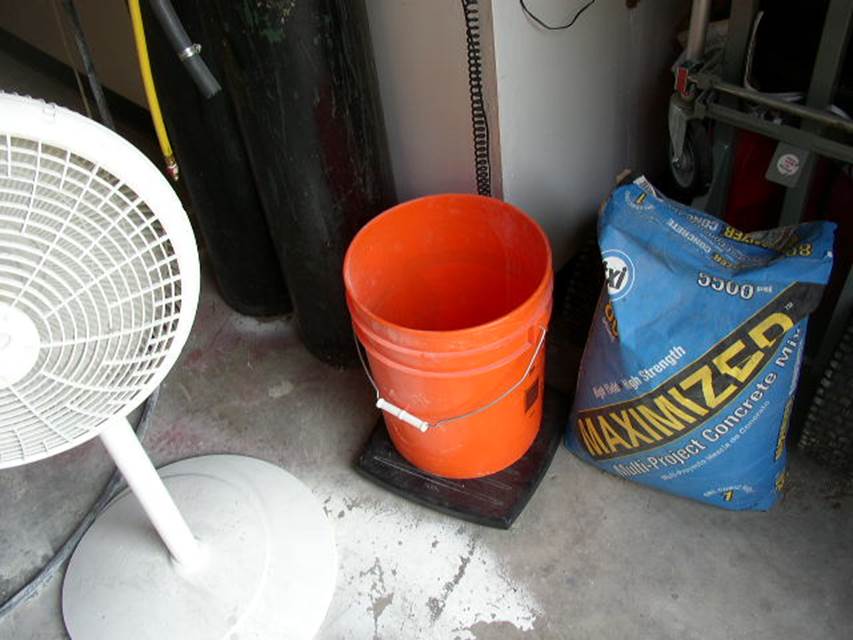
So, the procedure I followed was, weigh out 20lb of water in a 5-gallon bucket using my scale (zero it out first, of course), pour the water in themixer, turn the mixer on, slowly pour in 2 40lb bags, and tilt the barrel over & let it run for a couple of minutes so it’ll mix real well. Worked great.
Now about safety. Concrete dust can be deadly. It contains microscopic pieces of silica which get permanently lodged in your lungs and eventually kill you. I started out using a 3M “N95” dust mask from the hardware store, but that didn’t do a very good job. Instead, I ended up using a 3M half-mask that I got from my work (chemical plant). It’s a 3M 6000-series with “P100” filter cartridges. Basically, it filters out nearly 100% of the airborne particles, instead of 95% in the little paper ones from the hardware store. In addition, to keep the dust down to a minimum, I bought a misting fan from Walmart.
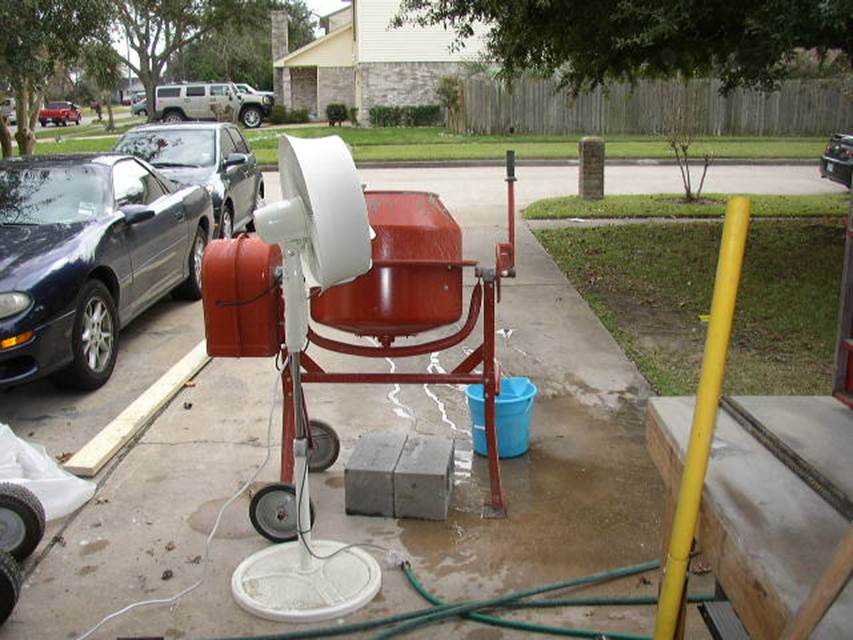
It hooks up to the hose & sprays a fine mist out with the air. That helped to blow the dust away from me, and the misting water knocked the dust down. It worked very well. And I’m still alive.
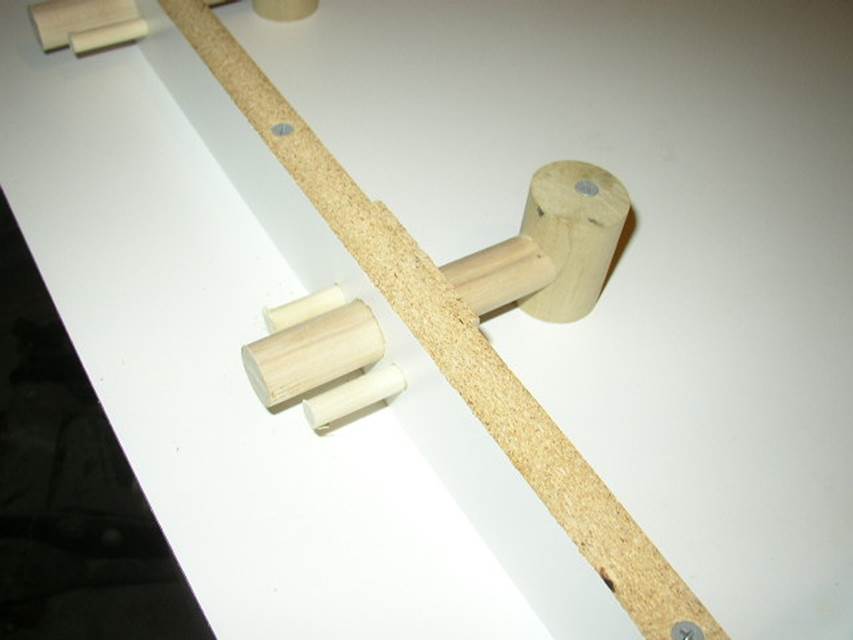
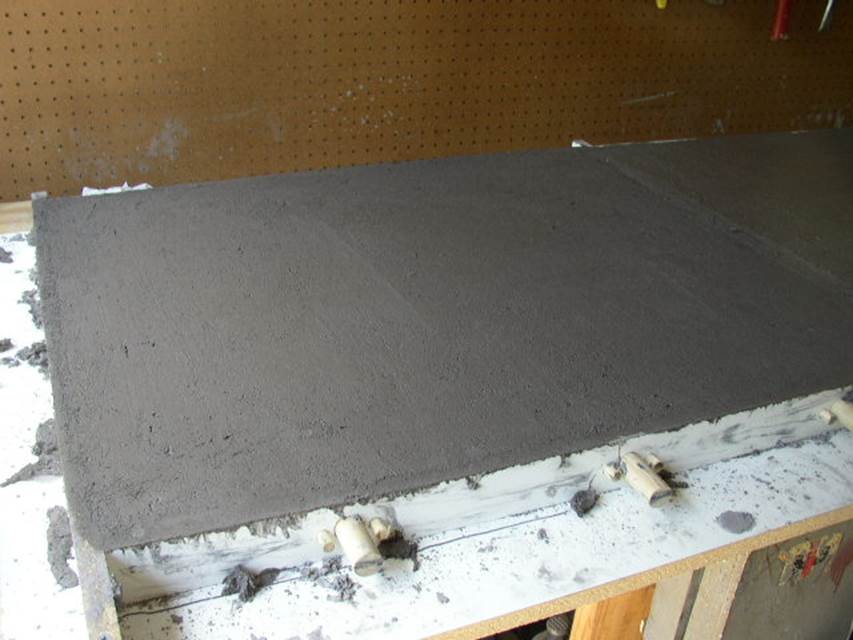
My dad & I worked together for about 3 hours. He’s the healthiest 70+ year old man I know. I would mix the concrete, then roll the mixer into the garage, put on the little wooden “chute” that I made, and he’d take a shovel & push the concrete into the forms, and even it all out.
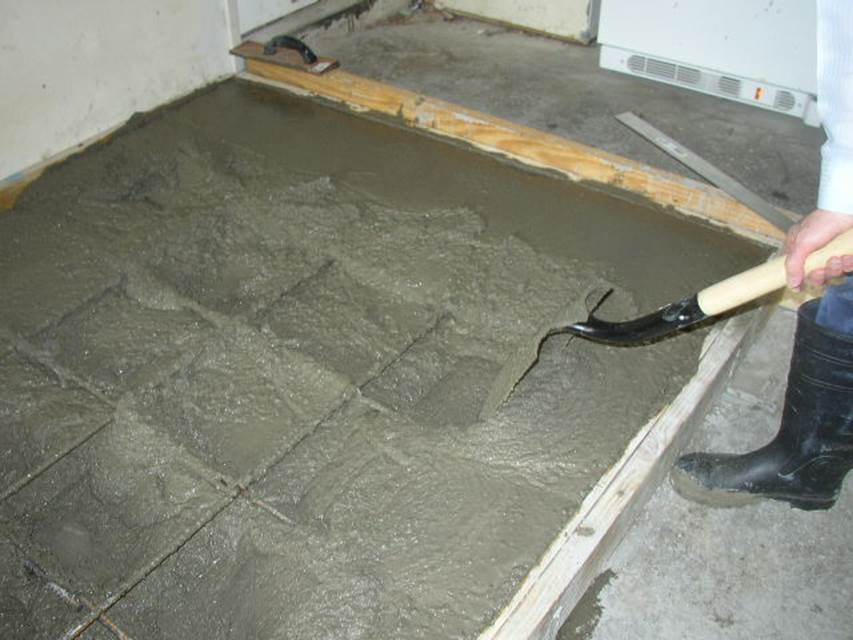
After it was up to the top, I used a long piece of wood across the form boards to level it out (called “screeding” I think). I also used a trowel, which is a flat piece of wood with a handle on it, to go over the concrete & smooth it out. I didn’t do a very good job, but I was too tired to care & the Maximizer bag warned about working the concrete too much, because that will rob it of some strength.
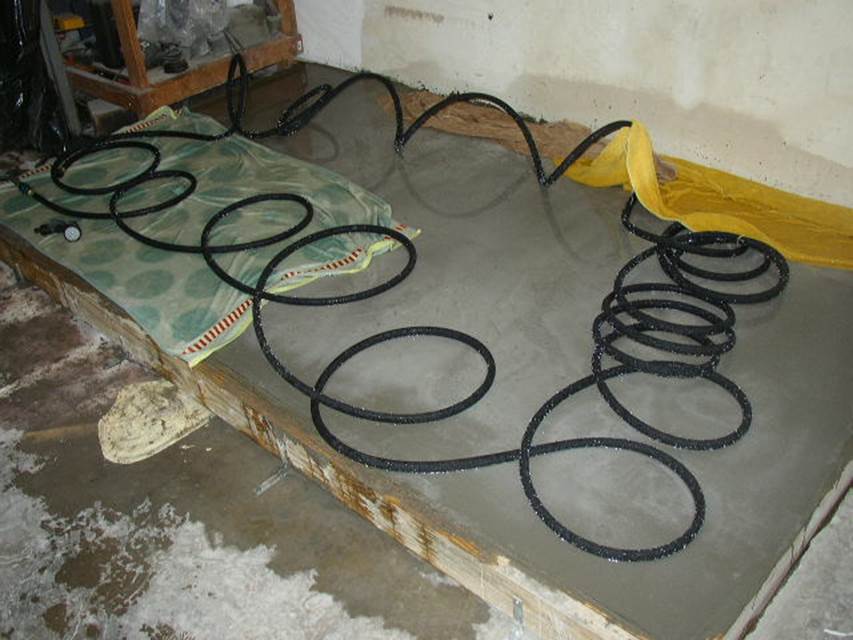
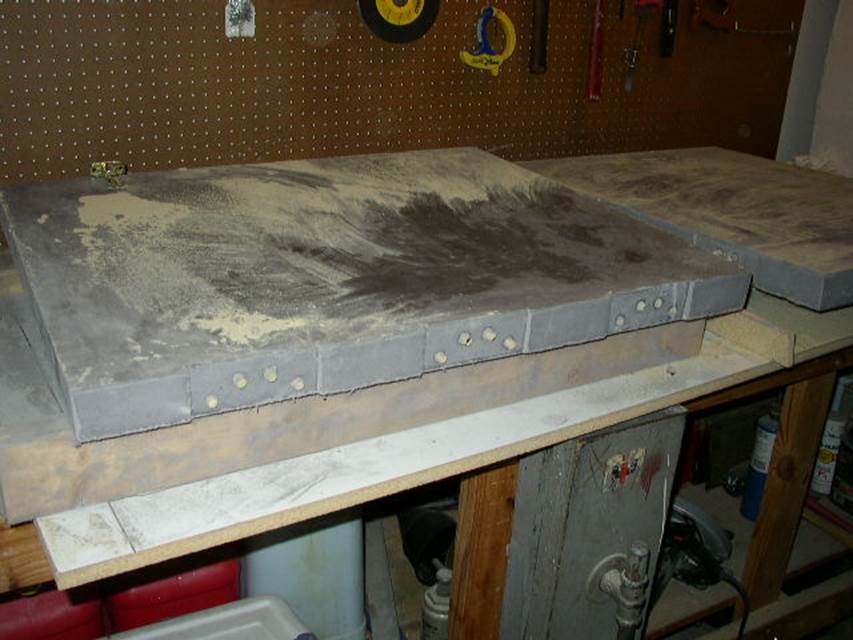
For about a week, I kept a soaker hose on the new foundation. Keeping concrete wet while it dries is the trick to prevent it from cracking. It’s also a good way to grow mold on a wall. But that was easy enough to get rid of; just a little chlorox and some fresh paint.
The Walls:
I designed the foundation to exactly fit some 6” concrete blocks that I found from a company in Louisiana. They’re called “VOBB” blocks:
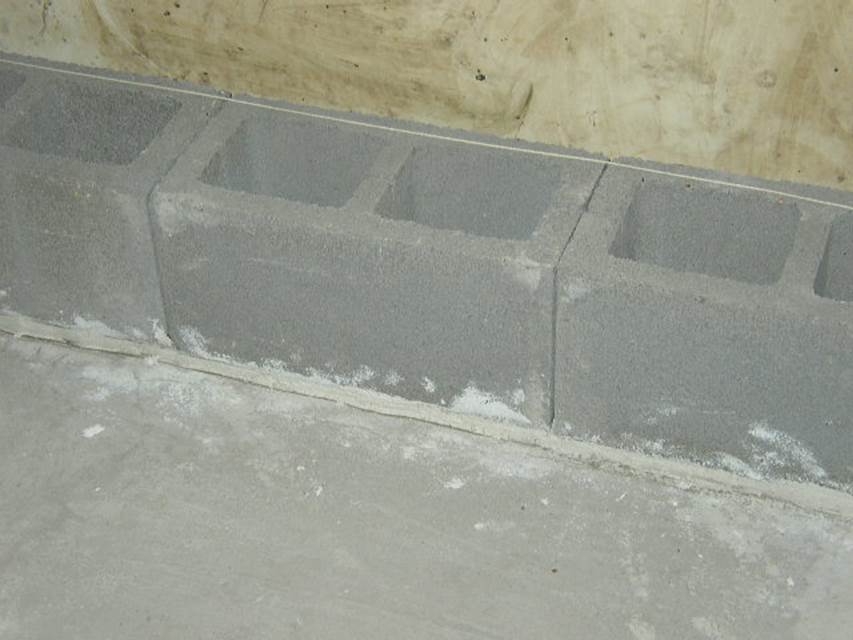
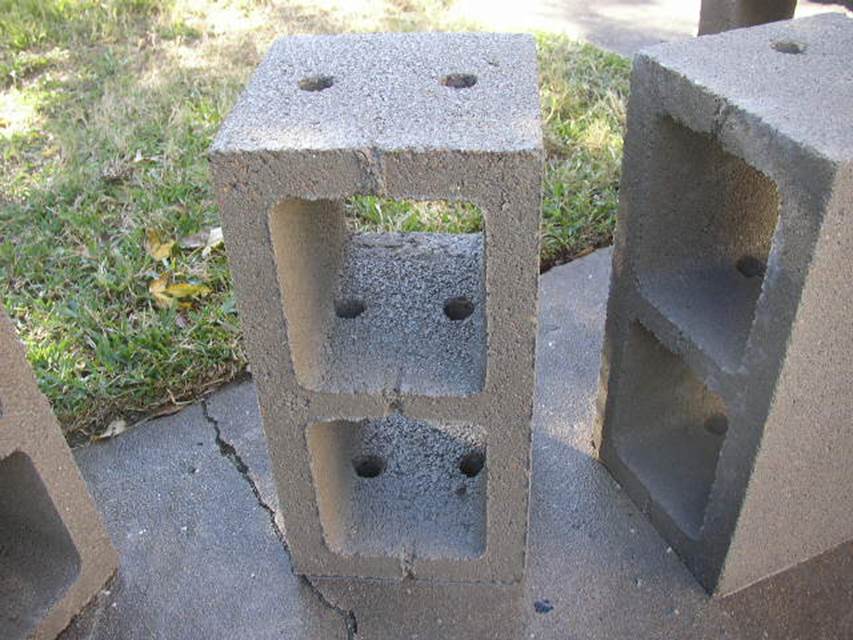
They’re awesome. You don’t have to put mortar in between the blocks. They’re made to exact dimensions, and the ends clip together, so all you do is stack them up, make sure they’re straight, and pour mixed concrete down the walls with rebar. I even took a trip to Louisiana to attend a VOBB training class on how to build with them. But, alas, it was not to be. The VOBB blocks are great, if you can get them. I was told by Lowe’s that they were going to stock them eventually, and they could special-order whatever I needed. Turned out not to be true. The blocks are heavy, and the block producer, the place where they make the darn things, is in Dallas and wouldn’t deliver less than a full truckload of blocks. I didn’t want to pay or store thousands of blocks, so after a month of trying to find a shipping company that would ship the blocks I needed for less than $500, I gave up. Instead, I decided to use plain old 8x16 masonry blocks. I found those at Lowe’s for a little over a dollar each. Those blocks come in “LW” (lightweight) and “HW” (heavyweight) varieties. What I was able to find out about them, they both have the same strength, the LW blocks are just lighter. So, I ordered a couple of pallets of the lightweight blocks be delivered to my house. Coincidentally, I found stacked 8x16” blocks matched my foundation pretty well, even though I designed it for 6” blocks.
The idea of dry-stacking the blocks was very appealing. It would be easier, and the mortar joint that’s typically the weak spot in a wall would be absent. So even though the regular 8x16 blocks aren’t supposed to be dry-stacked, I decided to do it anyway. It may be a little crooked, but who cares as long as it’s fun? I did need the first row to be nice & level at least. I found this stuff by Quickrete called QuikWall Surface Bonding Cement:
http://www.quikrete.com/ProductLines/QuickwallSurfaceBondingCement.asp
It’s actually made to facilitate mortarless concrete block wall construction, and on their web site there’s a document telling you exactly how to do that. I had a heck of a time finding it; no hardware stores had even heard of it. I finally found a Home Depot that had some in stock – dusty, old bags that looked older than God – and used it to lay the first row of bricks. I mixed it in a 5gal bucket, using a huge drill and a mortar-mixing paddle and holding the bucket still with my feet. The bucket spun around on me several times and nearly cut my legs to shreds. Next time, it’s a wheelbarrow and hoe! Anyway, I used a couple of 50lb bags of Quikwall and set the first row of bricks down, leveling them with a string and help from dear old Dad, on about a half-inch blob of QuikWall. Dad had some masonry tools that really came in handy, to scrape off the excess & make it look a little less like blobs of white goop.
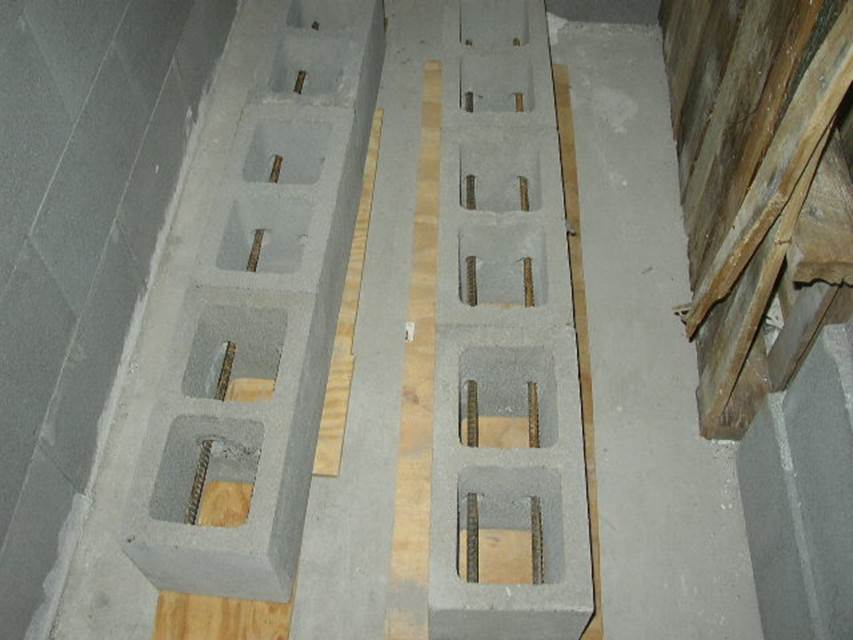
After I let that dry, the next task was going to be sticking the rebar in the foundation. I got out my trusty hammer drill and made deep holes in the center of every brick, used compressed air to blow them clear, then used my Hilti RE500 glue to set the rebar, just like I did in the foundation.
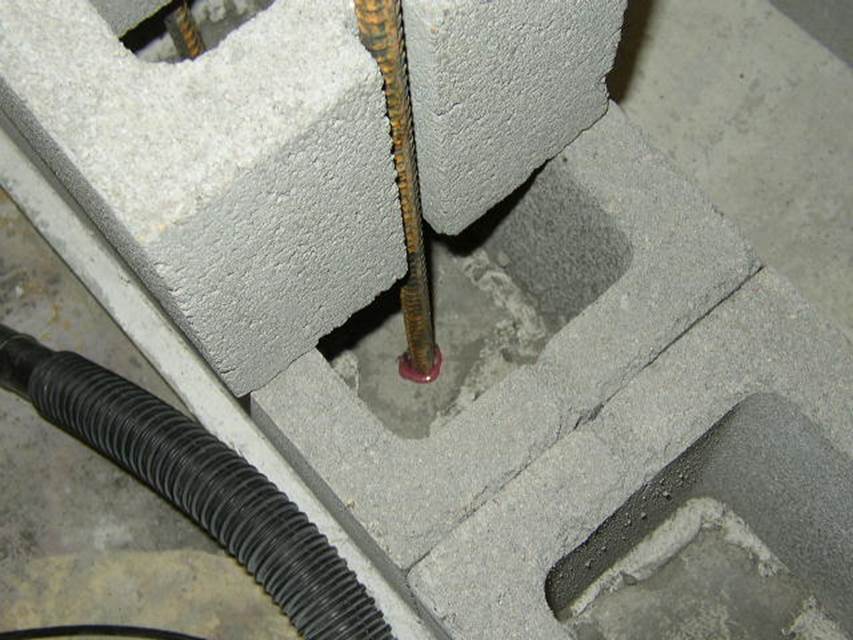
I used regular bricks to kind of hold the rebar more or less vertical until the glue dried. The rebar was high enough that I could pour the first few rows of blocks, and have enough left over to overlap the rebar (extending it almost to the ceiling).
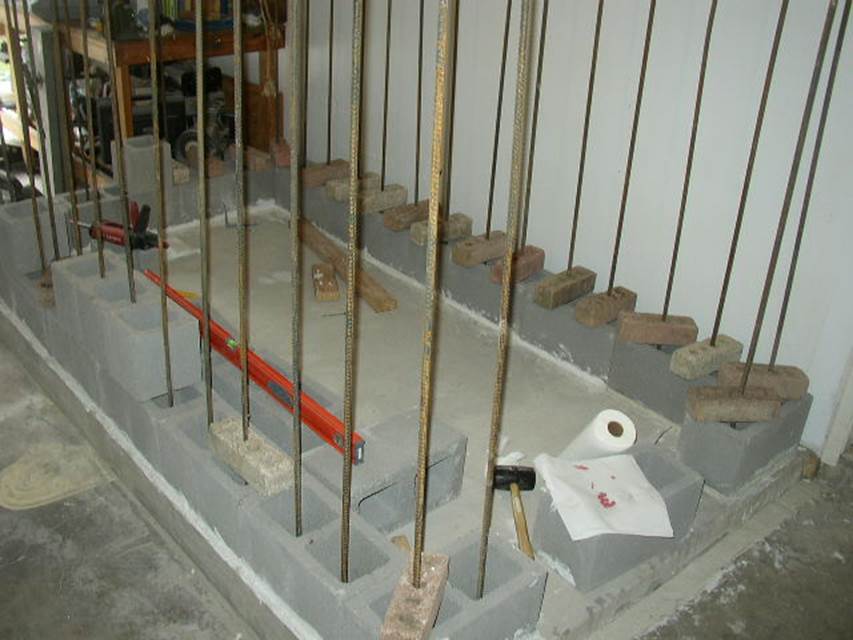
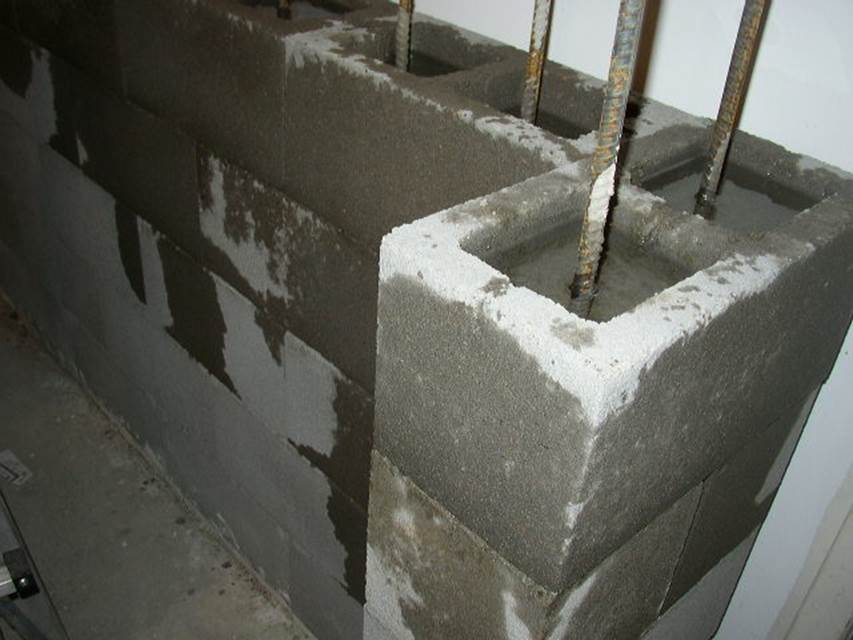
I could have used just one big piece of rebar, instead of lapping two short ones, but then to get the blocks on I would have had to lift them all the way to the ceiling. After the rebar was set, it was a simple matter of stacking the blocks up and trying to get them as straight as possible.
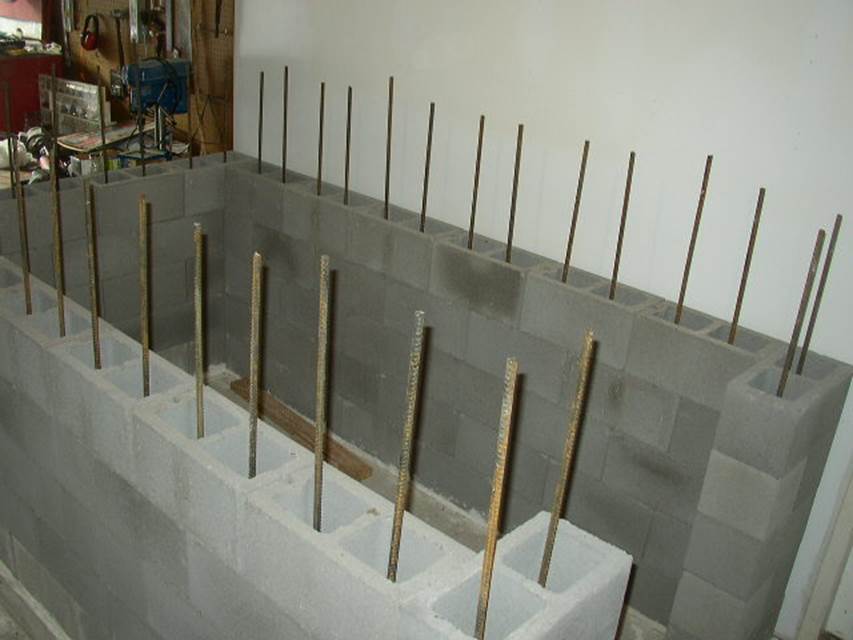
The main strength of the wall comes from the rebar and concrete poured down each cell. I decided to use Maximizer again, but when I mixed the Maximizer concrete for the walls, I added about 10% extra water. That was meant to compensate for the water that got sucked out by the blocks. Concrete blocks are rather porous, and they soak up water like a sponge. Then to help the concrete cure, after it was hardened, I poured some water down the tops until it got soaked up by the blocks.
The next big challenge was how to do the lintels. There was a “window” where the air conditioning was going to go, and a doorway. I had to get the blocks to go across those two openings without falling down. What I decided to do was drill each of three blocks, using a big ¾” masonry bit, and slide a couple of pieces of rebar down each one.
I put the blocks on wood, which doesn’t stick to concrete, and poured some more Maximizer down each cell. The result? An extremely heavy lintel.
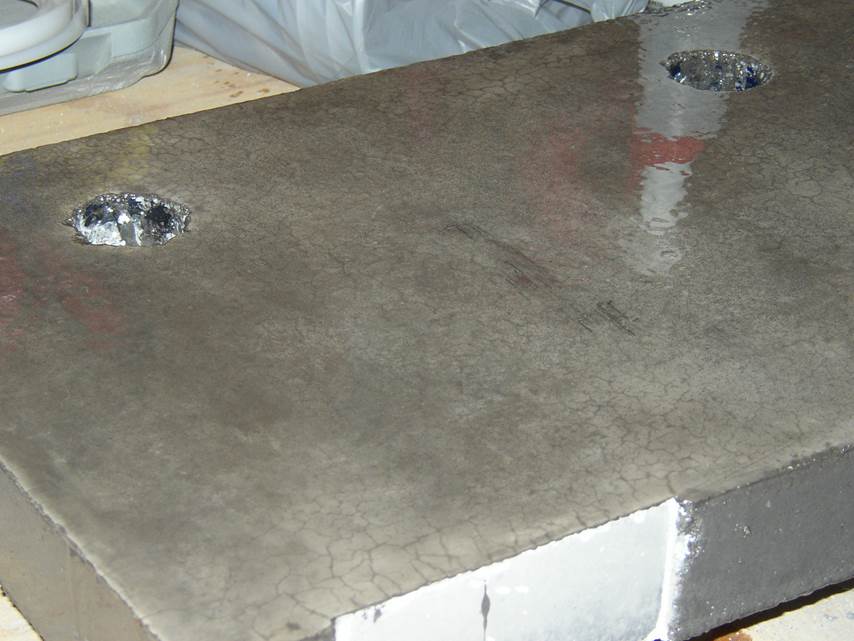
Once the concrete was dry, I pre-drilled 5/8” holes on top of the dried concrete so I could go back later & put short rebars in each cell. I had to get help from my 17-year-old son lifting the lintels. It wasn’t easy, but we heaved them up on top of the wall where they belonged. I then decided one row with horizontal rebar wasn’t good enough for a storm shelter. For the next row, I used a diamond “turbo” blade (about $14 from the hardware store) to cut a channel in several blocks.
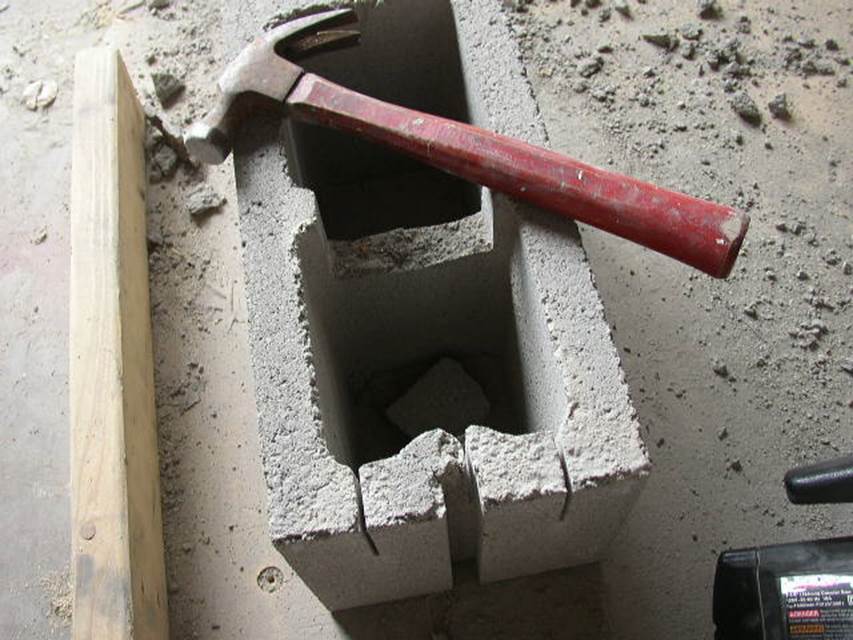
I made the cuts, then a gentle tap from the hammer knocked out the center pieces. Once these cut blocks were installed, I laid a couple of pieces of rebar on either side. Should make the lintels at least as strong as the rest of the structure.
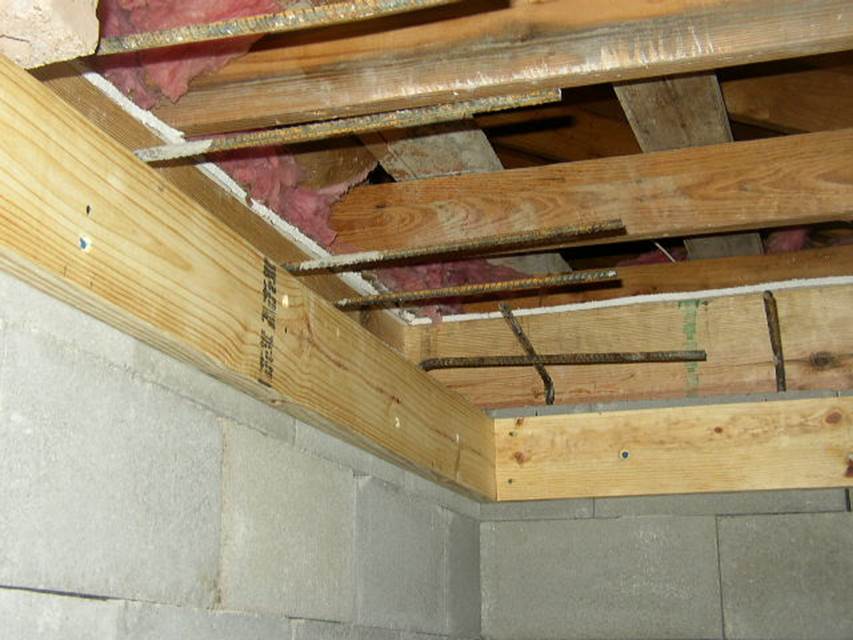
The Roof:
I wanted to make the roof out of concrete, in keeping with my too-much-is-really-cool theme. I decided to put some 2x12’s outside all around the shelter, secured with ¼” blue concrete bolts, as my form boards. Then after the concrete is poured in, I’d just leave the boards there.
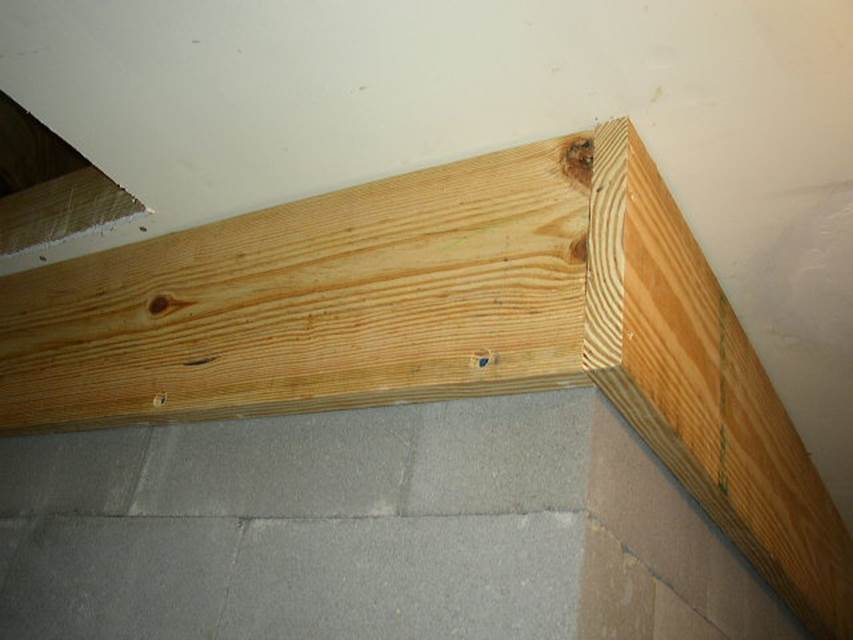
That gives the shelter the appearance of being connected to the house, without being actually connected. I cut a huge hole out of the ceiling sheetrock where the roof was going to be, plus a small 2’x2’ access hole(on the left side of the picture above). And to make sure the shelter roof was tied to the walls, I tied bent pieces of rebar to the vertical ones inside the cells, before I poured concrete down the last couple of rows of blocks.

You can see at about this part of the project, I got impatient and just used zip-tie’s instead of the rebar ties. Seems to work fine anyway. It was kind of hard getting a bucket up that high & tilting it so the concrete would pour out for those final couple of rows. I had a couple of pallets left over that I hadn’t returned, so I set them on some spare blocks inside the shelter & made myself a pretty high surface to stand on. And I used a smaller bucket that I could lift up & get the concrete to go in the right place.
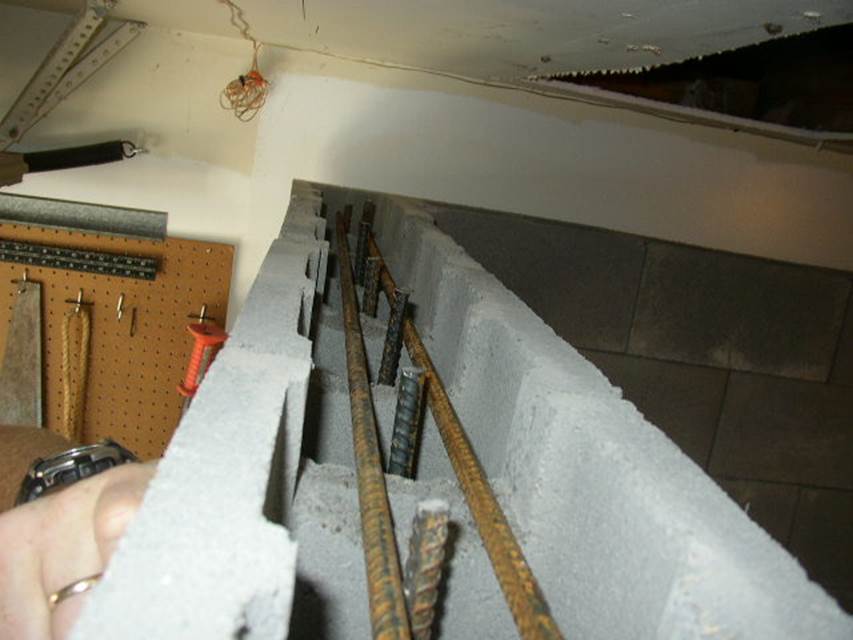
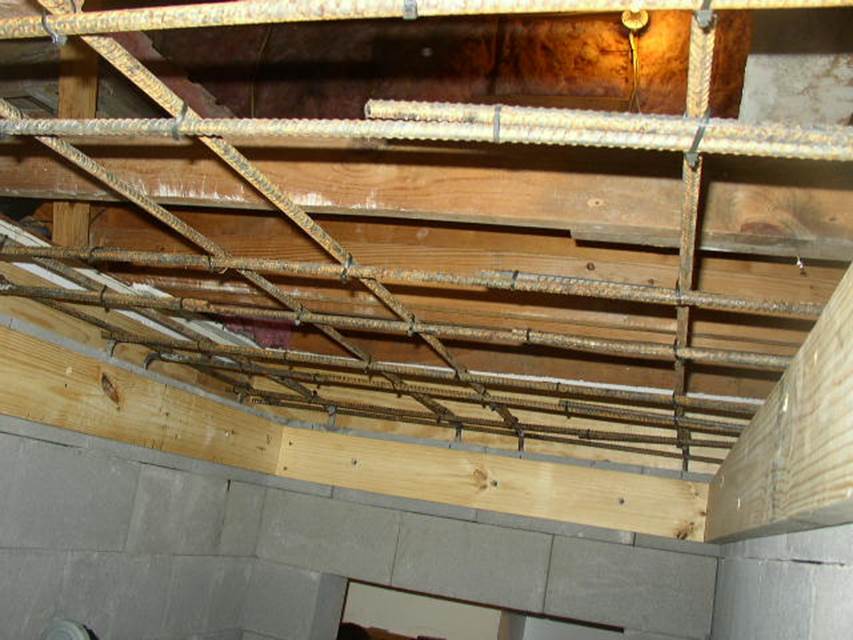
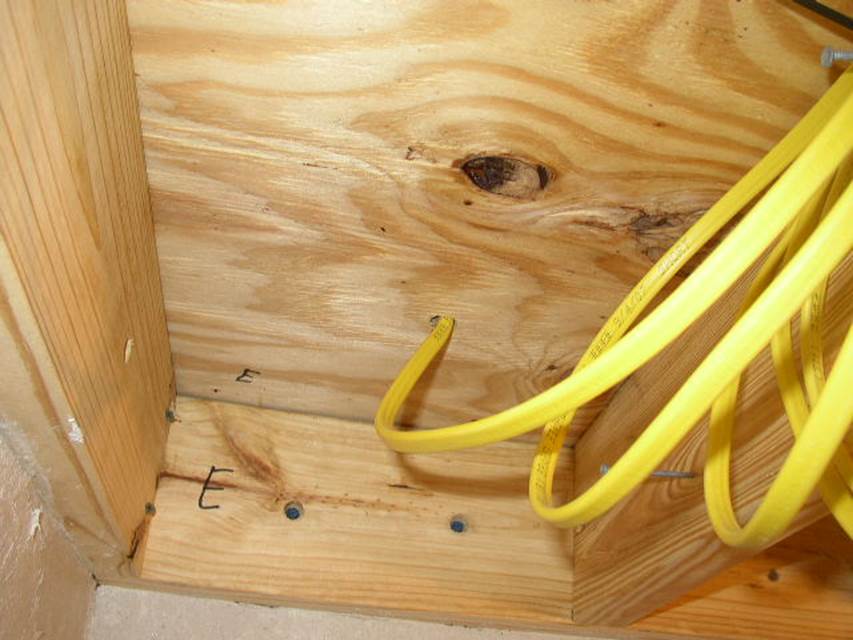
The ceiling of the storm shelter, on the inside, is ¾” plywood. To get the plywood to stay up, I put 2x6’s all around the inside of the shelter, secured with those ¼” blue concrete bolts again.
I had the lumber yard cut the plywood in half, so I would be able to slide them up in there one at a time after I finished the rebar. Speaking of rebar, once my form boards and 2x6 frame were done, I cut some rebar and tied it to the L-shaped rebars coming up out of the block cells. The rebar goes across about every 12”, give or take, in both directions.
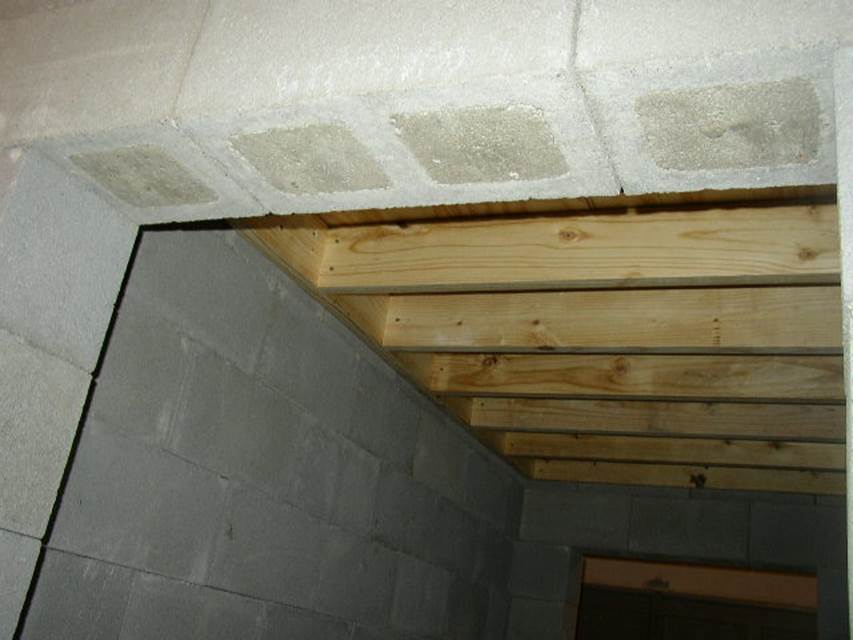
Then I installed the plywood, and ran 2x6’s across the bottom to make sure it would hold the weight of the roof while it dried. Here you can also see the bottom of the lintels, with the dried concrete.
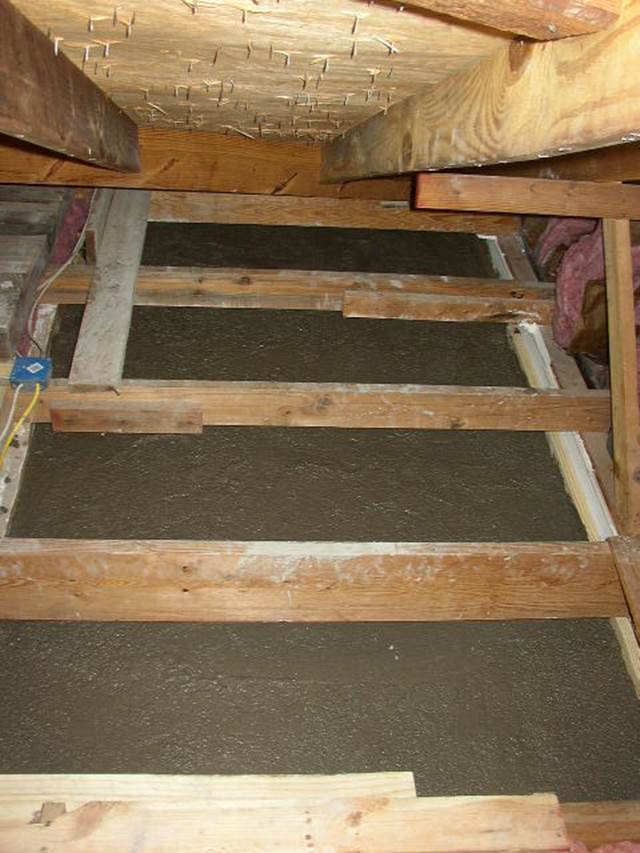
This is what the attic looked like before I poured the concrete:
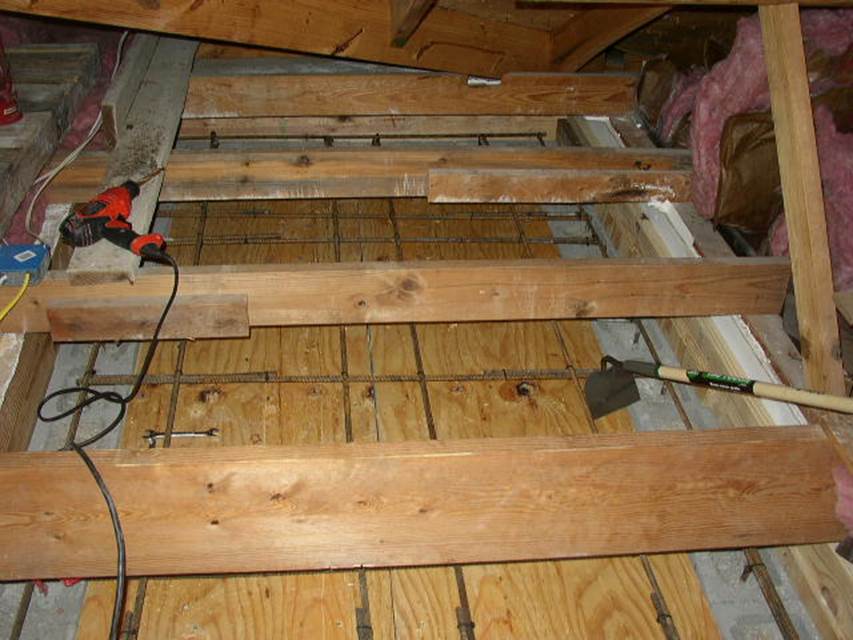
I sealed up the cracks with duck tape to prevent concrete form leaking. All those cross-beams in the attic were already there, holding my house’s roof up. It would have been nice if the attic was completely clear above the shelter, but I wasn’t so fortunate. To get the concrete up into the attic, I used my access hole next to the shelter wall. Then I used a block-and-tackle (couple of small pulleys & a rope) to carry a bucket of concrete up at a time.
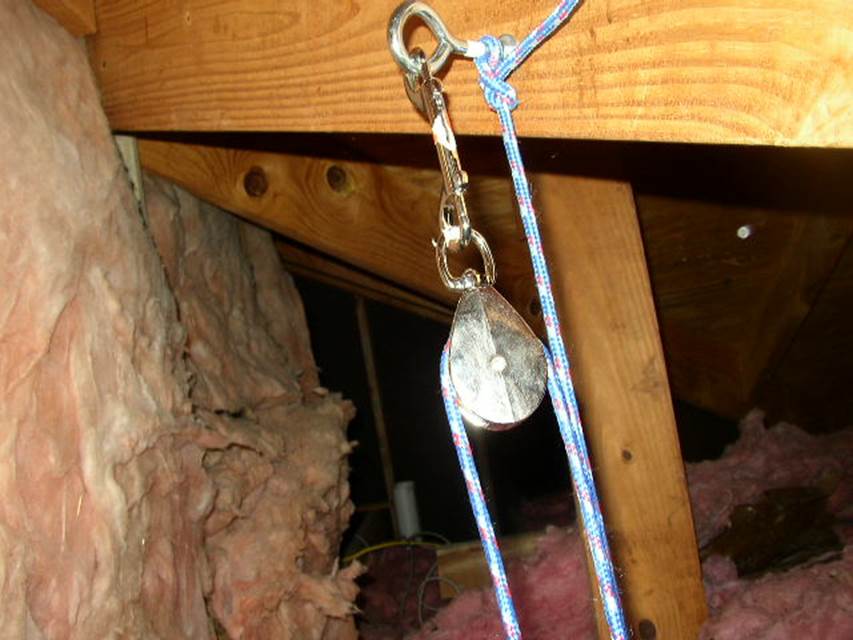
I enlisted the help of my teenage son, who stayed in the attic while my dad ran buckets of Maximizer concrete that I mixed, up to him with the block & tackle. Using this arrangement, and a 2 ½ gallon bucket, it was actually pretty easy to lift. The block & tackle, with an upper & lower pulley, makes the load half as heavy. My son spread the concrete around upstairs, to a thickness of about 4 ½” or so.
I didn’t bother toweling it smooth; who’s going to see it? Once it was firm to the touch, I put towels all over & sprayed them down to keep the concrete wet for a week. I tried not to make a ton of mold this time, though.
Finishing the
walls:
Since I used regular 8x16 blocks, the whole structure looked a little less than perfect. The blocks weren’t always lined up just right, and there were gaps here & there. Not to worry. Just cover the whole thing with stucco!
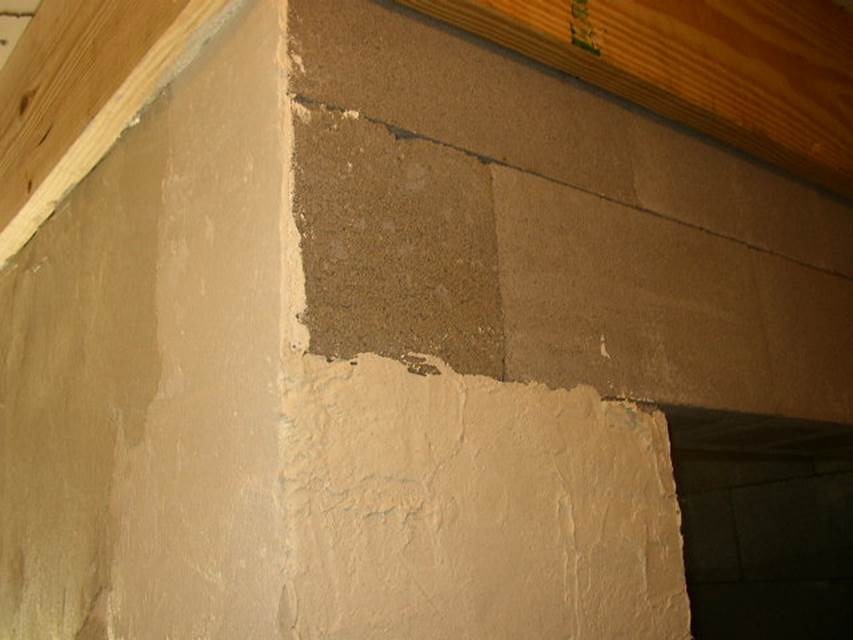
It’s actually not stucco. This stuff is called Concrete Bonding Cement. It’s much stronger than stucco is. You can’t mix it in the barrel mixer, because it’s too thick. So, another trip to my favorite Harbor Freight outlet and I got a portable mixer with a screw paddle:
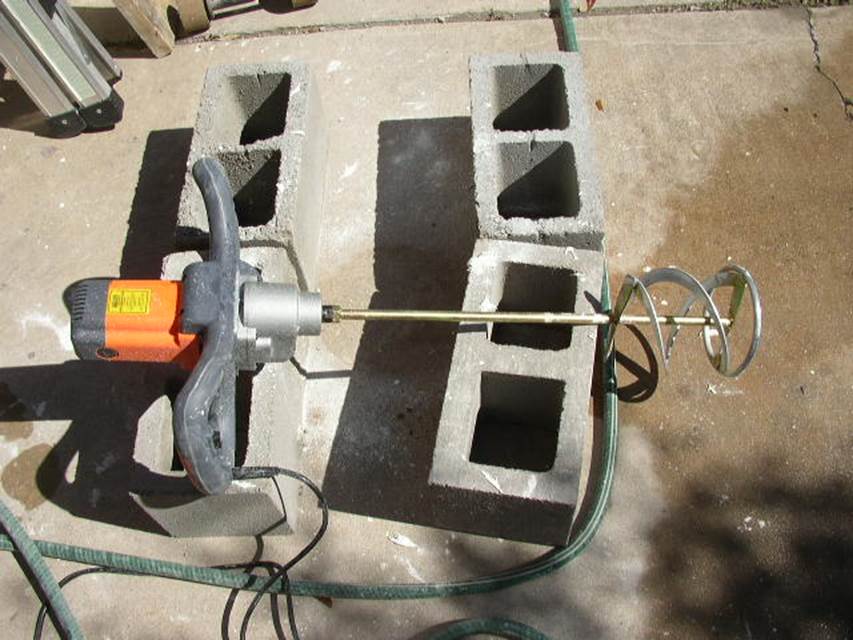
That and a bucket with bolts sticking out of both sides so it won’t spin.
I used a pair of spare blocks on each side to hold those screws in place so the bucket wouldn’t spin around while I mixed. This is the same Quickwall stuff that I use under the first row of blocks, to level it out, but this time I had a lot more to mix up. You get it to kind of a peanut-butter consistency, then get a trowel (flat metal thing with a handle) & smear it on the walls about 1/8” thick.
And of course it’s nice if you buy enough bags so you don’t run out with just a little bit left to do.
It’s not supposed to look smooth & pretty. The texture gives it a kind of artistic “Yeah, I did that on purpose” look to it. I’m not concerned at this point about aesthetics, really. The surface-bonding cement not only makes the wall strong; it also keeps moisture out.
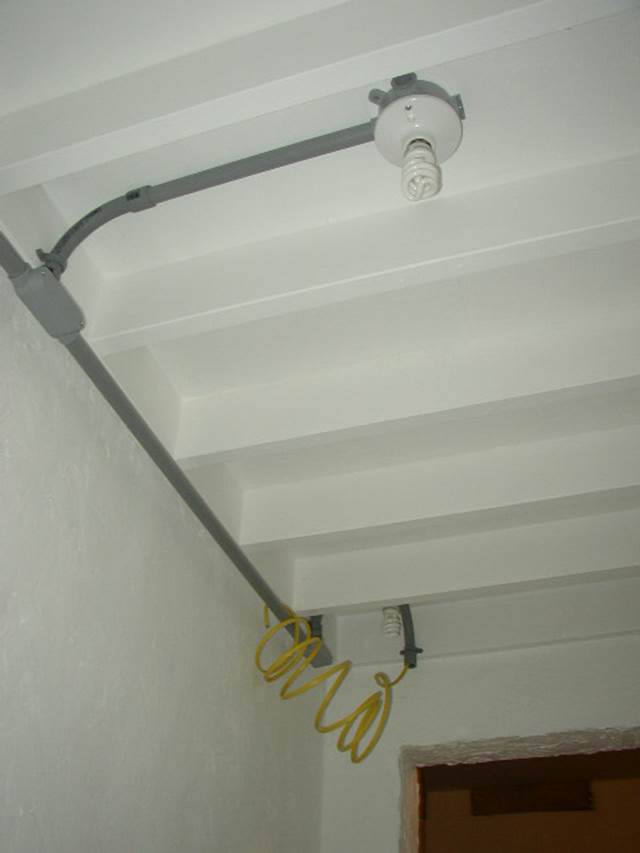
Electrical:
I used my big hammer drill to knock a hole in the ceiling from the attic. I stuffed a piece of PVC into the hole, and ran some #12 Romex down into the shelter.
That’s on the ceiling, just above the shelter doorway. After that, I got some plastic conduit fittings and finished the rest of the wiring. Where the power came in, I put a receptacle. Then I ran it down into a light switch, which is actually a twist-timer. Like the bathrooms at the truck stops – twist it around, and you get an hour of electricity. That way noone can leave the lights & air conditioner on for days in the Texas heat…
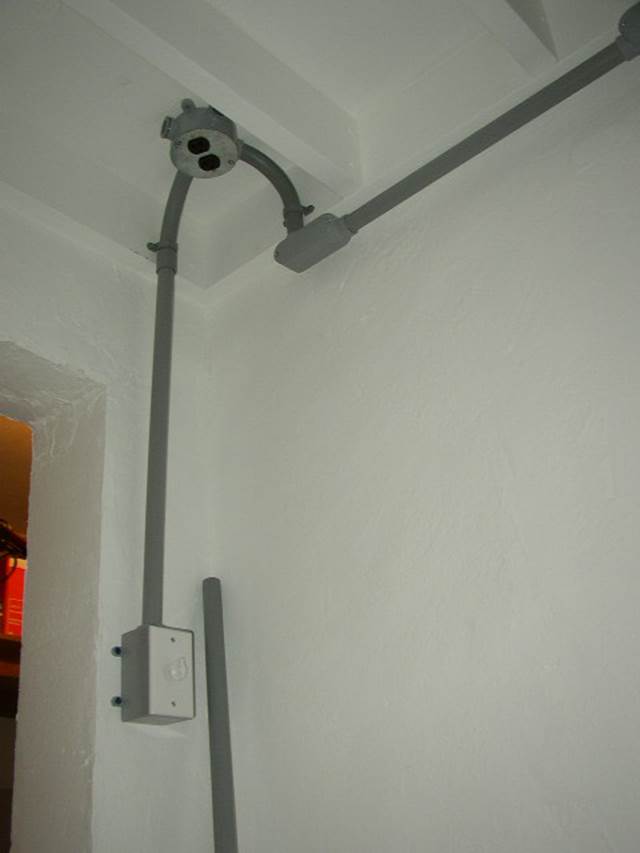
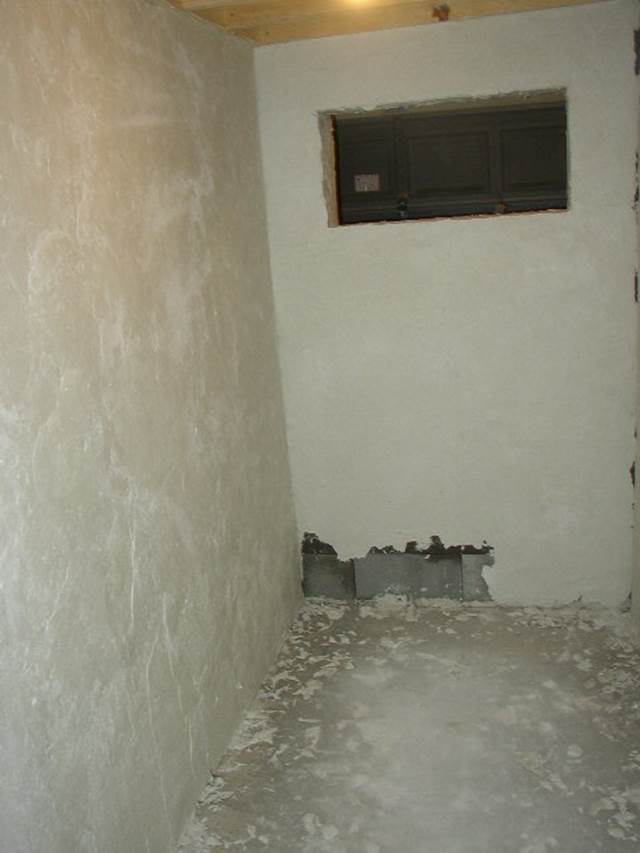
To add to my electric bill paranoia, I installed fluorescent bulbs on both ends of the shelter. You’ll also notice that I painted everything stark white.
Window Air
Conditioner:
To cover the window opening but still let the air conditioner work, I got a 1” section of “bar grating” from a local metal yard. This is the stuff people walk on all over the chemical plant. It can hold like a thousand pounds. The metal yard cut it for me into about a 3’ x 2’ section. And of course I paid ($45) for it before I saw that it was covered in rust:
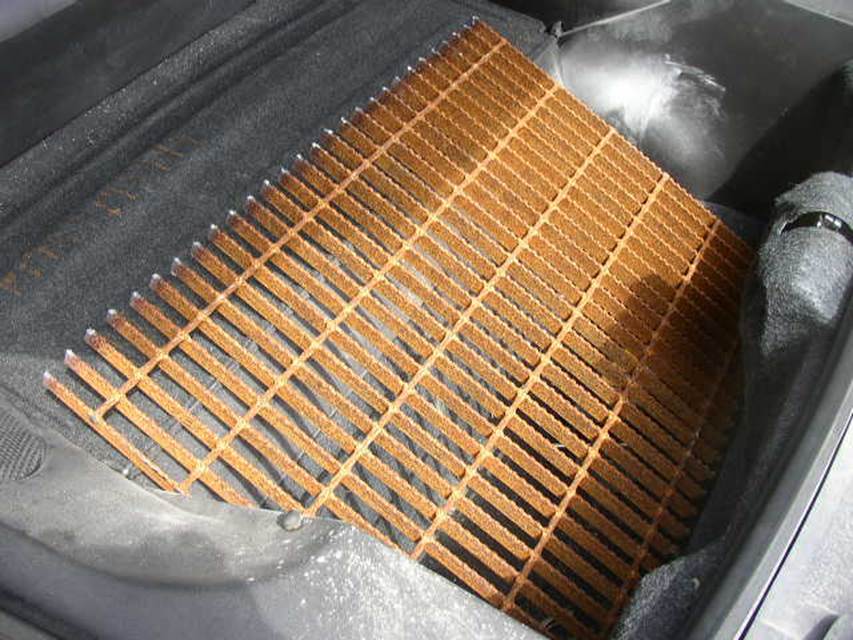
Oh, well. Nothing’s perfect. I could fix this anyway. On the recommendation of a friend, I found a local place that does powder coating. They charged me $160 (ouch) to sand-blast and powder-coat it white. Bar grating is usually something you walk on. It’s secured to the underlying structure with little metal clips. I used those clips to attach the grating to the window, but I decided I needed more strength (what else? Overkill is good…) So, I went to the hardware store & bought some 3’ sections of 1” angle-iron & painted them white to match my grating. And instead of using the little blue concrete screws, I cut some 3/8” all-thread pieces, and used my favorite RE-500 epoxy to secure them in holes I drilled in the wall.
(The lady at the Hilti store asked me why I wanted to use the RE500. Was I building a bridge or something?)
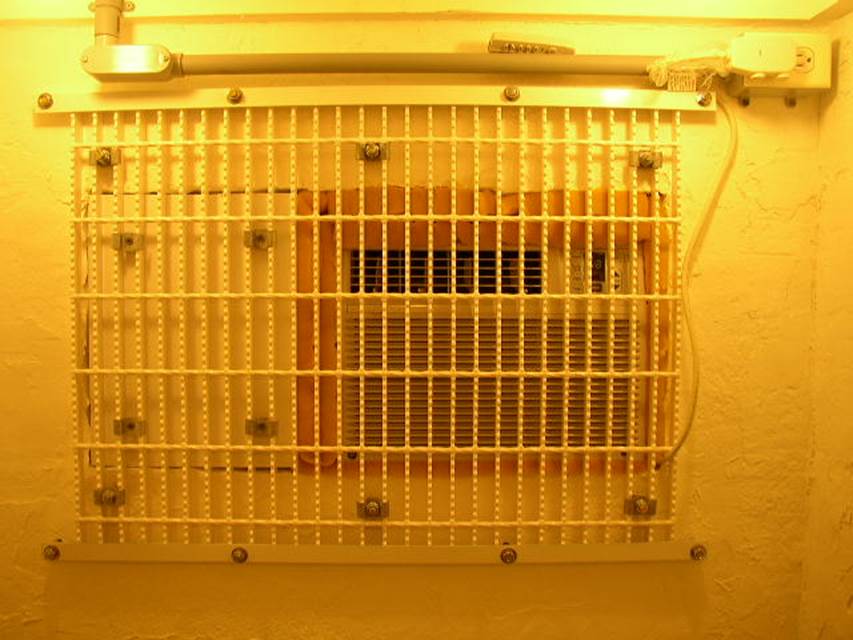
The plan is to put a couple of tools in the shelter, so in an emergency, if for some reason the door won’t open, I could unbolt everything, remove the grating & climb out the window. You never know…
As you can see, I slid a little window air conditioner up to the bar grating. It’s the smallest one I could find – it doesn’t take much to cool 32 square feet. I had to disassemble the plug to get the wire through the grating, and up to the outlet that I installed for it. The air conditioner is wired up with the lights to the same twist-timer, so it’ll only run an hour at a time. I cut a piece of 2x12 to fit the other part of my “window”, and secured it to the bar grating with four clips. On the back side, I made a little shelf for the back of the a/c unit to rest on, and used some old foam from a broken couch to fill in the rest of the holes.

Doors:
After all that hard work building a concrete building, it just didn’t seem right to put a wooden door on it. I looked at some test data in the FEMA document (361 I think) and even if you fortify a door with metal plates, it always fails right where the locksets are. I also priced some shelter doors, and let me just say that they must be in the same club with the plumbers. Cheapest FEMA-320 compliant door I found was over $1000! My original idea was to build a door out of two ¾” plywood layers, covered in 12-gauge steel plate, and attached with huge hinges. I was going to use a sliding “barrel bolt” that would only lock from the inside. That would have been fine, but thinking about worst-case scenario, I didn’t want anyone to be stuck inside, needing help, with no way for anyone to open the door from the outside. Or more practically, one of my kids gets in trouble and locks himself in there…
So I set out to design a concrete door with reinforced holes in it. I found this thick, dense concrete mix called Buddy Rhodes (http://www.buddyrhodes.com) normally used for concrete countertops. I build a small test form to see how strong it would be. The form had to have holes in it for the lock cylinders.
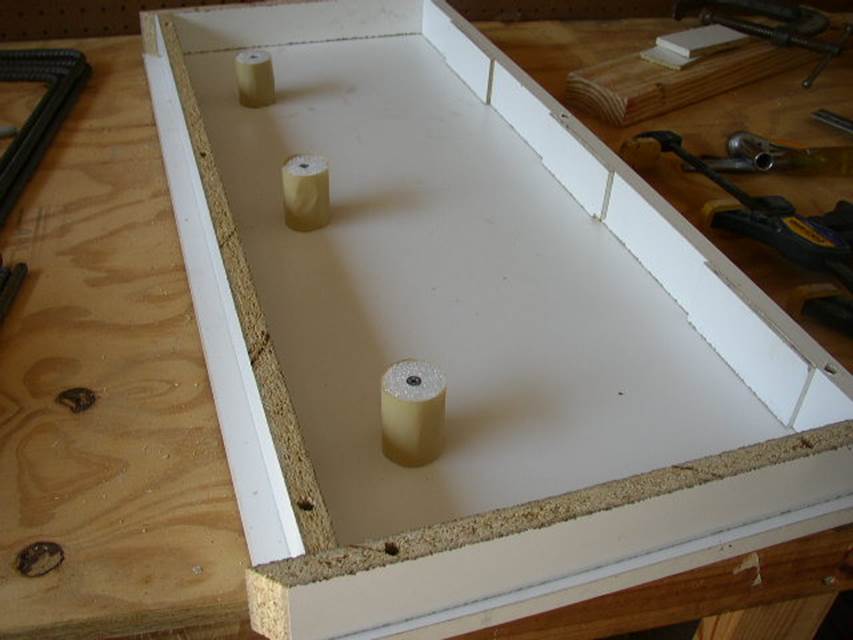
Those are 1 ½” Styrofoam pieces with packing tape around them. Should be easy to knock those out once the concrete dries. On the back side, you can see I put thin strips of melamine where the hinges would go. The whole thing is made out of melamine, in fact. This is part of a cabinet door that we weren’t going to use any more. So, I got a bag of concrete mix ($40 each – stuff’s not cheap!). I mixed it up in a bucket using my handheld mortar mixer, until it got thick, like cookie dough. I spread it into the form, added a few L-shaped rebar’s (3/8” thick), added more concrete, more rebar, and then did my best to make the top level. It turned out really heavy – about 65 pounds, and it’s not full-sized yet!
I covered it with some polyurethane, just to see how pretty it would look. Turned out not too bad, really. The holes for the locks didn’t turn out well, though. The Styrofoam lost its shape and the holes ended up too small. I tried making them bigger with a paddle blade in my screwdriver, but there’s no way this concrete could be affected by a mere paddle blade. I even tried to use my hammer drill, and it either bent the bit, or broke a big chunk of the concrete off.
That’s where I tried to make the long holes for the lock cylinder. Maybe I should have let it dry a little more, I don’t know. But on my real forms, I was going to have to use something to cast any holes in place because once it’s set, it’s set. I took the practice door outside and tried to break it, just to see how strong it was. I put it on two bricks, jumped in the middle; nothing. I threw pieces of wood, then bricks at it. The bricks broke, and scratched the surface of the door. I heaved it over my head & hurled it on the ground several times, onto some bricks, and finally got it to crack. At last, I took a sledge hammer to it, and after four or five hard blows, it started to give way. All in all, it proved itself to be a formidable structure that I’d have no reservations trusting to protect me in my storm shelter.
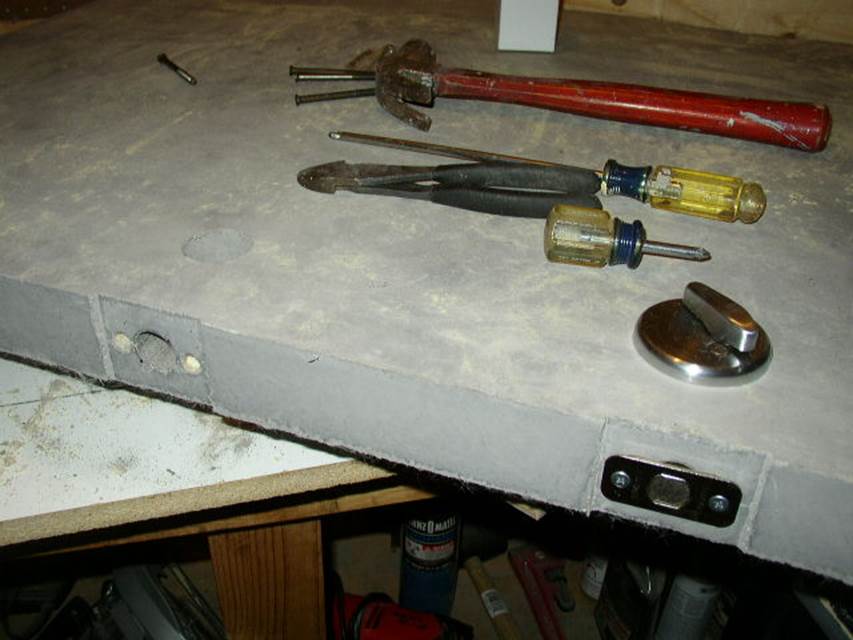
So, on with the main event. I took my hinges and bolted them to a piece of wood. In the doorway, I put that piece of wood up against the door jamb and secured it to some 3/8” all-thread that I had epoxied in place (you know how I love that red epoxy!). I intentionally made the holes a little big so I could adjust the door once it’s installed.
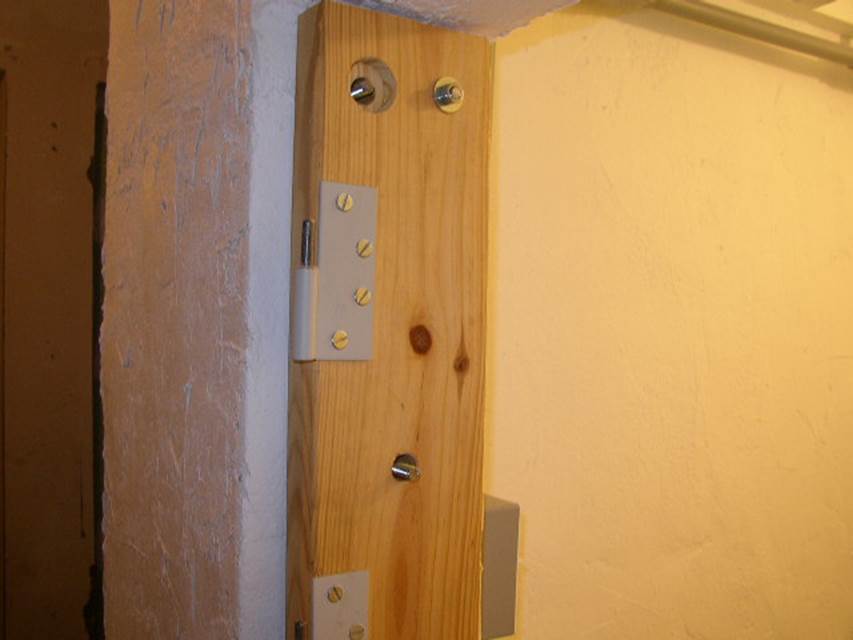
I used some 4-inch large “lift-off” hinges, part number 234090 from HardwareSource.com (http://www.hardwaresource.com/Store_ViewProducts.asp?Cat=1061). Cost me about $10 each with shipping. Lift-off hinges come apart and allowed me to heave my 100lb door up and onto the pins.
On the forms for the real doors, I ended up putting dowels everywhere a door knob, lock cylinder, or even bolthead would go:
The theory was, I put in some concrete, a thin layer, then add rebar, then push these dowels into place, more concrete, more rebar – so the lock cylinder shaft would be surrounded by rebar on top and bottom. That made the door come out to 2 1/16” thick. I did the same type of thing on the back side for the hinges.
These little 3/8” dowel rods would go into the concrete, and I’d just twist them out when the concrete dries, and have a nice hole that I can use to epoxy my hinges on, right?
NOT!
Also, this time I mixed in some fiberglass “micro-fibers” with the concrete, to help strengthen it. Makes it look a little hairy when it dries. Here’s the rebar going in over the first thin layer:
And here are both half-doors all formed up and drying away:
I didn’t take a picture of all the rebar, but basically there’s a big square of 3/8” rebar going around the whole perimeter (two L’s that meet in opposite corners), with two vertical ones in the middle of the square. On top of that, I put six ½” rebars horizontally across on each side of the doorknob holes. Then I pushed in the dowels, filled the form almost full up with concrete, and put another 3/8” layer of rebar (two L’s to make a square and two vertical pieces in the middle). Then when it dried, I gave the dowels a nice twist, then a harder twist, then I mutilated one with a big wrench; they just would not budge. To get the form boards off, I endedup cutting them thin with a circular saw, and knocking them out with a wood chisel (careful not to chip the concrete, of course).
Those dowels for the hinges were not coming out. So, plan B – use them to screw the hinges on. You can see on the far hinge here, I cut them flush with a small saw. It should be easy enough to drill holes in them and screw in some long wood screws to secure the hinges. Maybe it’ll work fine after all. The doors came out to be around 150 lb each. They are very heavy, feel extremely stout, and will probably look quite lovely once they’re sanded down a little, covered in urethane and decked out with shiny hardware.
As it turned out, after about 3 days of sitting on the workbench propped up on sticks (to allow the air to get under it), I was able to twist most of the dowels out, even the big ones for the locks. Here you can see the holes turned out very nice, and the locks fit perfectly. I left the little wooden dowels in place on either side of the small hole, so I could screw the dead-bolt down.
Next task was to get these behemoths up onto the hinges. After attaching the hinges to the door frames, it became apparent that there was no way in heck that I was going to be able to lift these monsters up & carefully line up the hinge pins. What I did instead was carry the doors over to the door frame with the 2x6 attached, and got it over the 3/8” allthread just enough to have one of my kids thread a nut on.
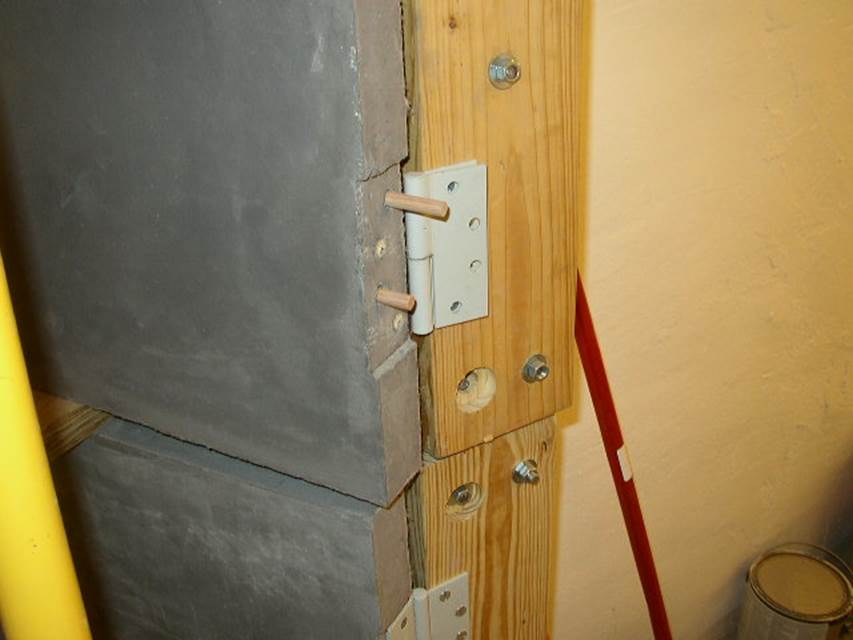
Above you can see my two half-doors installed. I used some shims to line them up with my somewhat crooked door frame. Each hinge was attached with two 3” long no. 8 deck screws to a couple of dowels that I didn’t twist out. After considering filling the remaining holes with epoxy, I decided (in case I ever needed to take it apart) to epoxy in some oak 3/8” dowels in those empty holes. Once the epoxy dried, I put more wood screws on the hinges. It was very hard to screw into those dowels. Oak is tight.
On the other side of the doorway, I made a similar 2x6 with big holes in it. Turns out my doors were a little on the big side, so I had to cut down the leading edge a little.
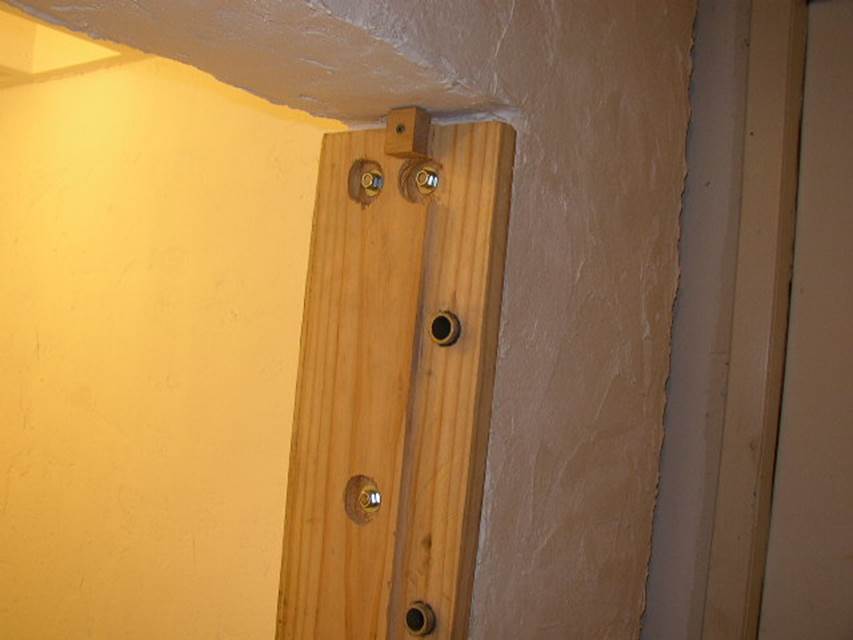
Those pipes you see in the picture are about 6” long. I used a 1” concrete bit in my hammer drill to make holes, and I epoxied these pipe nipples into the wall where the dead-bolts would go inside. So, with the door shut and all 6 locks engaged, the entire wall would have to be destroyed before the doors would open back up again.
After some paint on the door jambs and polyurethane on the doors, it all looked quite nice.
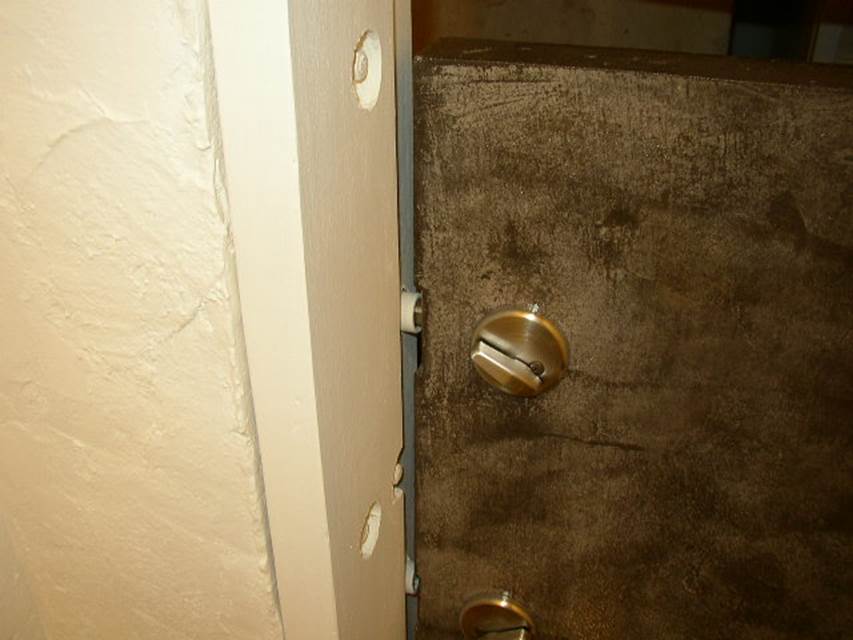
This is an inside shot, where you can see the top lock is turned in. With three locks per half-door, it’s quite sturdy.
I used some polyurethane that I got from the decorative concrete store. It’s called Arizona Polymer Flooring (http://www.apfepoxy.com/) and it comes in two cans that you mix in a 1:2 ratio. It was a two-step process; first came their “Polyurethane 250”, which I mixed in a small mixing cup (stirring for one minute with a drill & small paint-mixing paddle) & applied with a foam brush. Nastiest smelling stuff I ever used. It took a few hours to clear the fumes out of the garage. For the top coat of their “Polyurethane 100”, per instructions I mixed it for two minutes in a mixing cup, and this time I spent the $15 to get a decent angle paint brush to apply it & get a nice even finish.
In retrospect, there are three things I regret about my door. First, I should have made it all out of one piece. I’ve got two half-doors now that don’t line up with each other that well, and they’re kind of cumbersome to swing out of the way, especially with no handles, which I’m afraid to install because I can’t drill holes in this door. Second, the lift-off hinges were a mistake. I should have used regular hinges, since the big holes in the doorframe allowed me to get the door in position easily anyway. And third, I searched everywhere for something like this, and finally found it about a month after the doors were complete:
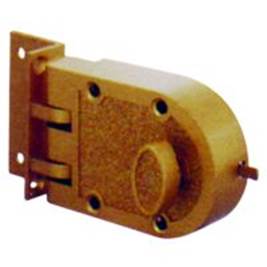
It’s a “Jimmy Proof Lock Cylinder”. It surface-mounts to the door, and requires only a small hole for the cylinder to protrude out the other side. It may not be perfect for a 2” thick door, but I could have cast in place some little pipes where the bolts would go, and the lock cylinder, so I could mount it with four through-bolts. Don’t know if I could have extended the lock cylinder to the front side of the door, but maybe the key would have reached. I also don’t know if I could have gotten them keyed alike. But, the beauty of it is, I wouldn’t have had to use double rebars around the dead-bolts, it would have been much easier to install, and best of all, it would be extremely easy to line up the part on the door jamb that the lock goes into. Plus, they’re cheaper. Oh, well. I suppose what I got will serve its purpose, and it probably looks better than these things would.
Finishing touches:
To complete the asthetics of my little shelter, I wanted to try my hand at concrete staining. If you’ve ever worked with concrete, then you will be able to imagine that this homeowner’s first ever attempt at troweling a slab met with marginal success. Meaning, the floor was anything but smooth and staining it would have made the ugly come out even uglier. So, after consulting with the guys at Decorative Concrete Supply (http://www.decorativecs.com), I decided to do an overlay. It was a five-step process: stain-prep, primer, overlay, stain and urethane.
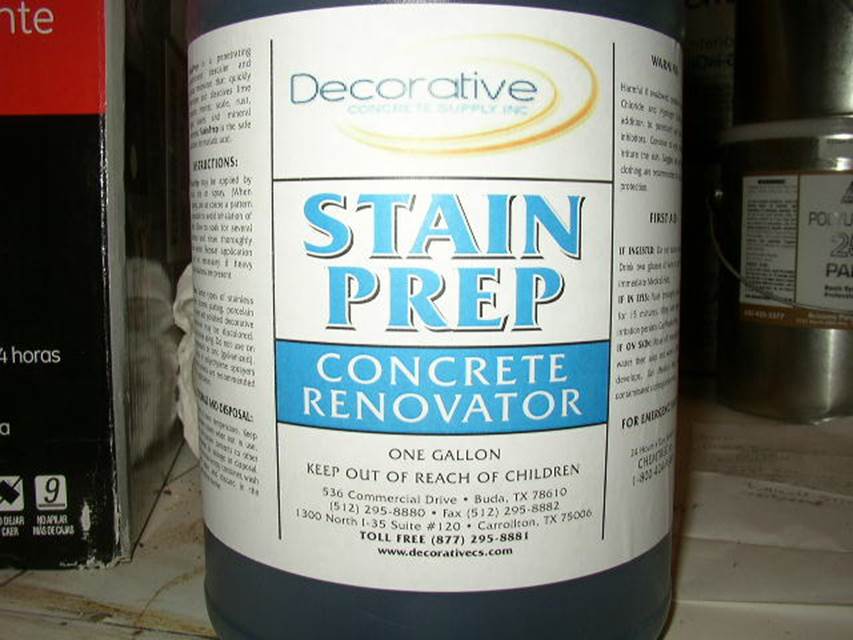
The stain prep kind of “etches” the surface of the concrete up so it’ll accept the primer. After a thorough sweep of the shelter floor, I poured some of this stuff into a plastic paint tray liner and used a scrub brush to work it into the surface. Next came the primer.
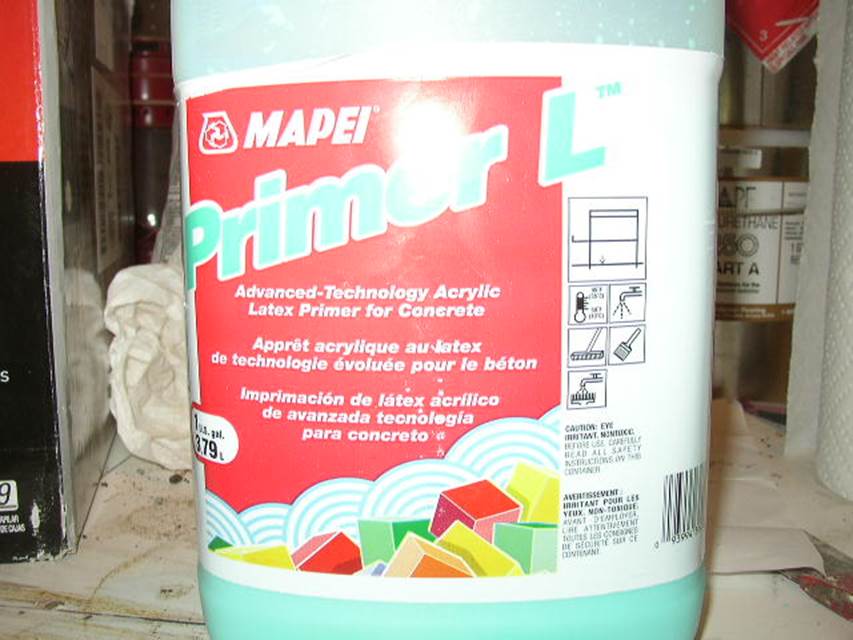
Using another paint tray liner, I rolled it onto the surface with a paint roller, using a ½” nap roller. Looked horrible when I finished, but hopefully it was supposed to.

Next came the overlay itself. I used this stuff called M20:
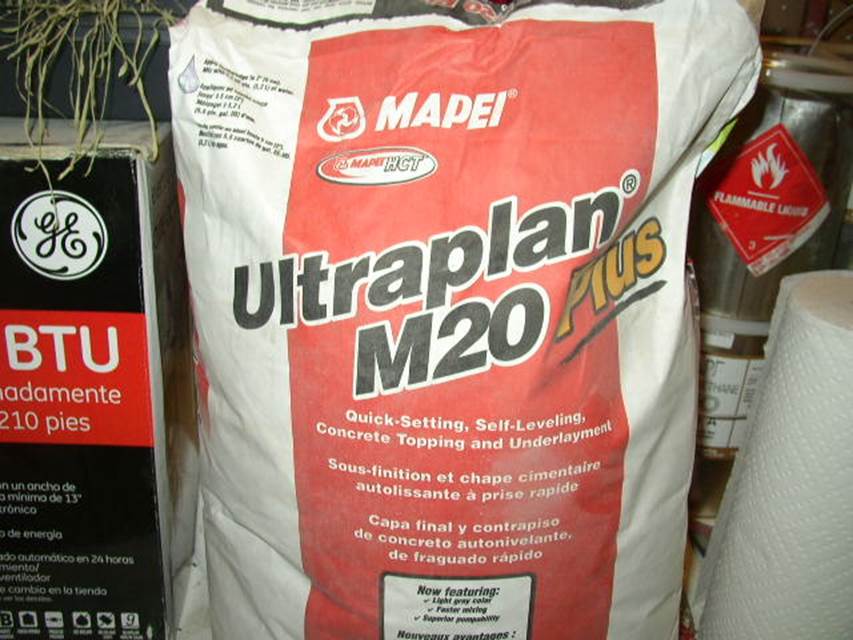
Pretty cool stuff. I measured out the water (5.5 quarts) into a 5-gallon bucket, poured the whole 50lb bag in, then mixed it with my hand-held concrete mixer, using the same blade as I did for the door concrete mix. Turned out that was a mistake. My concrete mixing blade was made for really thick stuff, and I should have traded it out for one of those paddle-type paint-mixing blades. There are some very specific instructions on how to mix the M20, and if you don’t do it just right, you get air bubbles. And so I did. The overlay was pretty cool, though. It pours out right onto the concrete, and I spread it around (per the instructions) with a big squeegee that Decorative Concrete sold me (called a “Magic Trowel”). You have to work fast. It pours out of the bucket like thick soup, and you’ve got maybe 10 minutes before it starts to harden. I did end up with some bubbles, but the overall effect was quite a transformation; went from a crude uneven rough surface to a silky-smooth gray lake. Oh, and I used a piece of the thickest weather strip I could find across the doorway, to prevent my soup from spilling out.
Next came the stain.
I diluted this 50/50 with water & applied it with a big sponge I got from the auto parts store, normally used for washing cars. I let it sit for the specified 8 hours, and mopped up the white residue that rose to the surface. Did a second coat of stain (first one didn’t turn out very dark) and it started to look more black than brown. It really darkened up when I put on the urethane. Unlike the doors, for the floor I applied it with a paint roller on a long stick, using a 3/8” nap roller. I stood in the doorway & rolled first the Polyurethane 250 on, followed by the Polyurethane 100, and the result was absolutely stunning. Well, stunning for me, or maybe it was just because I was feeling woozy from the fumes. (We had to actually leave the house for several hours, it was so strong.) If you plan to do this yourself, I would like to also stress that besides being smarter than me by using a paint-fume mask, you don some nitrite gloves before handling any of these chemicals or you may end up not just woozy but with skinless hands.
Final touch to the floor was some molding. Being a little tired of the project by this time, I wanted to put some cheap rubber molding and be done with it. The problem was, my paint roller didn’t quite reach the wall, so I had to do something to get those rubber molding pieces to “stick out” enough so you wouldn’t see the unfinished concrete in the corner. No problem. More 3/8” dowel rod to the rescue.
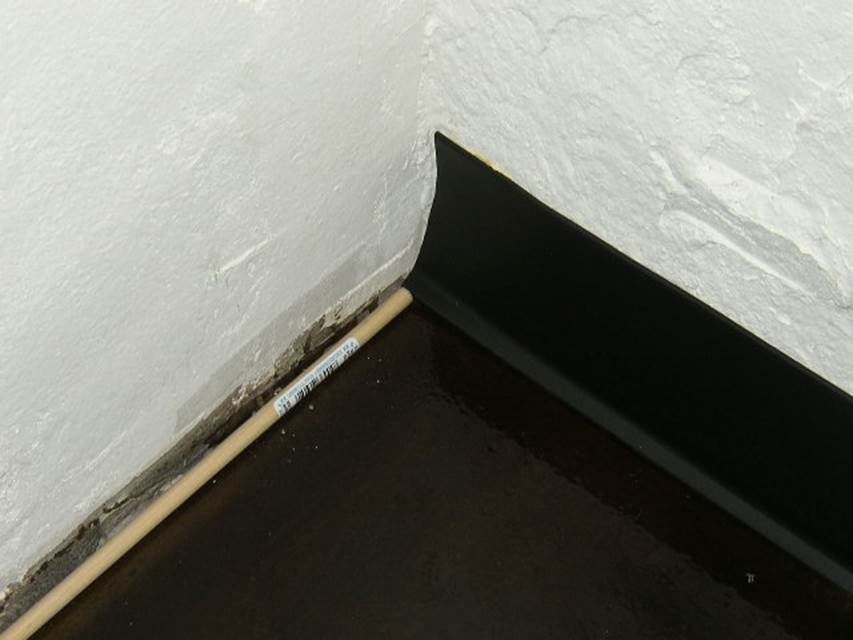
I bought self-adhesive rubber molding, and of course it didn’t adhere to my stucco walls. I ended up having to get some wallboard adhesive & glue the rubber to the walls. And, it took forever to dry, so I had to prop a piece of wood up against a small section at a time, wait for it to dry, then move down & glue another section, until it was all finished.
Conclusions:
I’m very happy with my little project. There’s still more in my head that I want to do. It has to be stocked with supplies or chairs or something, so my family of 6 can handle being in there for up to 8 hours as a storm rips through. And then I want to build another concrete structure, maybe just a big “box” in my garage office, to hold all of the other supplies – water, food, etc. Just imagining that the whole house gets blown away, I’d be in deep squat if I didn’t have the food and water that I so conscientiously gathered because it got blown away by an F5.
If you’d like to see a silent video tour of the shelter, see below. Feel free to contact me via email at mark@ls1m.com, but don’t show up at my doorstep on the eve of a hurricane landing. That’s what the big dog and shotgun are for ;>)
-the end